Audi A4: Differential
Overview - Differential
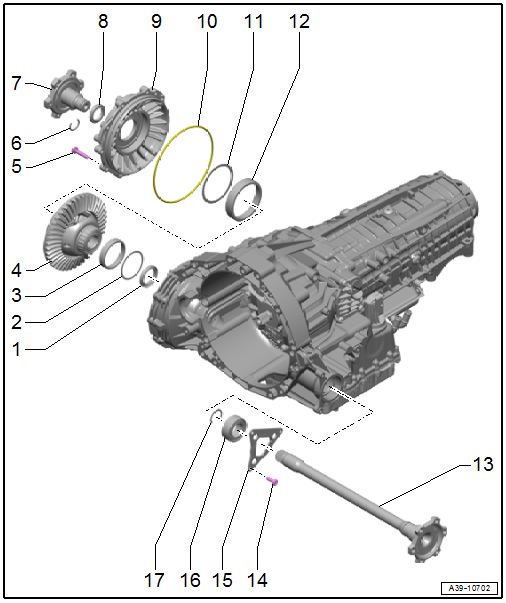
1 - Left Flange Shaft Seal
- Replacing. Refer to → Chapter "Left Seal, Replacing".
2 - Shim
- Behind the taper roller bearing outer race
3 - Taper Roller Bearing Outer Race
4 - Front Differential
5 - Bolt
- Tightening specification and sequence. Refer to → 7-Speed Dual Clutch Transmission 0CK; Rep. Gr.39; Differential; Overview - Differential.
6 - Circlip
- Replacing
7 - Right Flange Shaft
- Removing and installing. Refer to → 7-Speed Dual Clutch Transmission 0CK; Rep. Gr.39; Differential; Right Flange Shaft, Removing and Installing.
8 - Right Flange Shaft Seal
- Replacing. Refer to → 7-Speed Dual Clutch Transmission 0CK; Rep. Gr.39; Seals; Right Seal, Replacing.
9 - Final Drive Cover
- Removing and installing. Refer to → Chapter "Left Seal, Replacing".
10 - O-Ring
- Replace after removing.
11 - Shim
- Behind the taper roller bearing outer race
12 - Taper Roller Bearing Outer Race
13 - Left Flange Shaft
- Removing and installing. Refer to → 7-Speed Dual Clutch Transmission 0CK; Rep. Gr.39; Differential; Left Flange Shaft, Removing and Installing.
14 - Bolt
- Tightening specification: 10 Nm + 90º
- Quantity: 3
15 - Gear Carrier
- Attached to the left flange shaft with the bearing -item 16- and the circlip -item 17-
16 - Bearings
- For the left flange shaft
17 - Circlip
- for the left flange shaft bearing
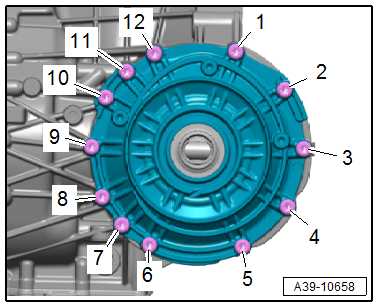
Final Drive Cover - Tightening Specification and Sequence
- Tighten the bolts in steps according to the specified sequence:
.png)
Left Flange Shaft, Removing and Installing
Special tools and workshop equipment required
- Engine and Gearbox Jack -VAS6931-
- Sealing Grease. Refer to the Parts Catalog.
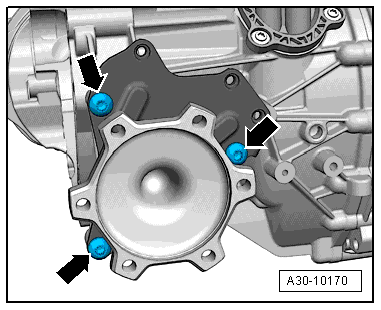
Removing
- The transmission is installed.
- Remove the bolts -arrows- from the flange shaft mounting bracket.
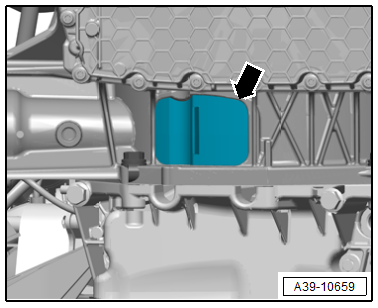
- Remove the lower cover -arrow- from the transmission.
 WARNING
Risk of damaging the seal between the final drive and the transmission housing when removing the flange shaft.
- If the flange shaft -arrow- is not held in a central position, the seal on the flange shaft spline will be damaged.
- A seal must be replaced if it is damaged.
- To avoid damaging the seal, support and guide the flange shaft out of the opening in the transmission.
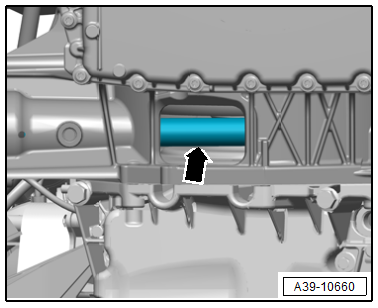
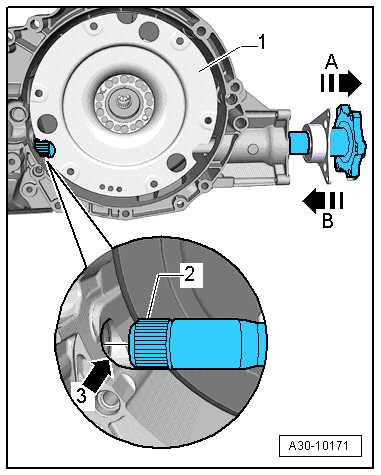
- Remove the left flange shaft from the transmission in direction of -arrow A-.
 Note
Note
Ignore -items 1 and 3- and -arrow B-.
Installing
Install in the reverse order of removal while noting the following:
Note
Replace the bolts that were tightened with an additional turn.
WARNING
Risk of damaging the seal between the final drive and the transmission housing when installing the flange shaft.
- If the flange shaft -arrow- is not held in a central position, the seal on the flange shaft spline will be damaged.
- A seal must be replaced if it is damaged.
- To avoid damaging the seal when inserting the flange shaft, support and guide the flange shaft into the opening in the transmission.
- Slide the left flange shaft -2- into the transmission in direction of -arrow B-. When doing this, insert the flange shaft centrally into the seal on the front differential -arrow 3-.
Tightening Specification
- Refer to → Chapter "Overview - Differential"
- Upper control arm and coupling rod. Refer to → Suspension, Wheels, Steering; Rep. Gr.40; Upper Control Arm; Overview - Suspension Strut, Upper Control Arm.
- Drive Axle. Refer to → Suspension, Wheels, Steering; Rep. Gr.40; Drive Axle; Overview - Drive Axle.
Right Flange Shaft, Removing and Installing
Description of the procedure. Refer to → 7-Speed Dual Clutch Transmission 0CK; Rep. Gr.39; Differential; Right Flange Shaft, Removing and Installing.
Special Tools
Special tools and workshop equipment required
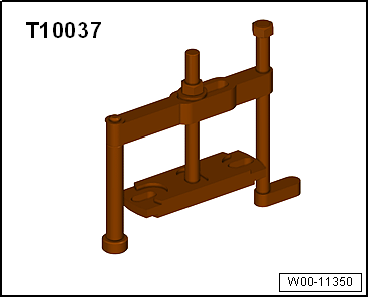
- Puller - Flanged Shaft -T10037-
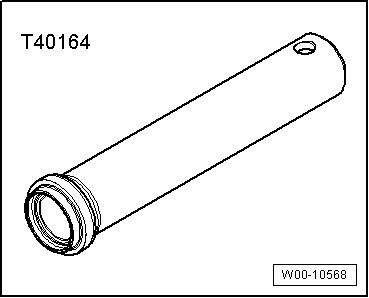
- Seal Installer - Flange Shaft -T40164-
- Engine and Gearbox Jack -VAS6931-
- Sealing Grease -G 052 128 A1-
Revision History
DRUCK NUMBER: A005AI0721
.png)
READ NEXT:
 General, Technical data
Technical Data
Identification
The following details can be found on the transmission
housing -arrows-:
Codes
Serial Number
Production Date
Capacities
Safety Precautions
General Safety Precauti
Repair Information
Guidelines for Clean Working Conditions
Thoroughly clean connection points and their surrounding
areas with engine or brake cleaner before loosening and allow
the cleaned connection points to dry
SEE MORE:
Setting the central locking system
You can adjust the central locking system to your
preferences. The settings depend on the vehicle
equipment.
Applies to MMI: Select on the home screen: VEHICLE
> Settings & Service > Central locking.
Door unlocking
you select All, all doors and the luggage compartment
lid will be un
Front Bumper Cover, Removing and Installing
To complete the procedure, a second technician is required to be at the
following position.
Special tools and workshop equipment
required
Pliers -T40172C-
Adapter -T40172/1-
Removing
- Push in the front wheels and loosen the wheel housing liner near
the front bumper cover. Refer to
→&
