Audi A4: Front Center Armrest
Overview - Front Center Armrest
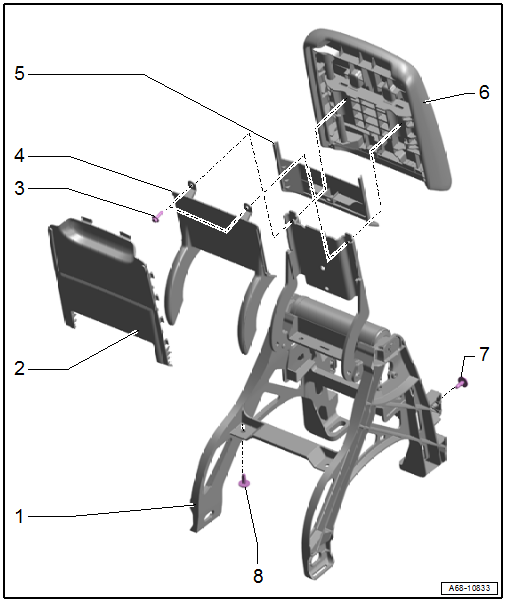
1 - Center Armrest Support Base
- Removing and installing. Refer to → Chapter "Front Center Armrest, Removing and Installing".
2 - Front Cover
- Removing and installing. Refer to → Chapter "Center Armrest Upper Section, Removing and Installing".
- Press on until it engages audibly
3 - Bolt
- 1.2 Nm
- Quantity: 2
4 - Hinge Arm Front Trim Panel
- Removing and installing. Refer to → Chapter "Hinge Arm Trim Panels, Removing and Installing".
- Press on until it engages audibly
5 - Hinge Arm Rear Trim Panel
- Removing and installing. Refer to → Chapter "Hinge Arm Trim Panels, Removing and Installing".
- Press on until it engages audibly
6 - Center Armrest Upper Section
- Removing and installing. Refer to → Chapter "Center Armrest Upper Section, Removing and Installing".
7 - Bolt
- 3 Nm
- Quantity: 2
8 - Bolt
- 3 Nm
- Quantity: 4
Front Center Armrest, Removing and Installing
Removing
- Remove the center console (refer to → Chapter "Center Console, Removing and Installing") and place it on a soft surface.
- Remove the screws -arrows- for the center armrest -1-.
- Flip up the center armrest.
- Disengage the side of the center console from the center armrest.
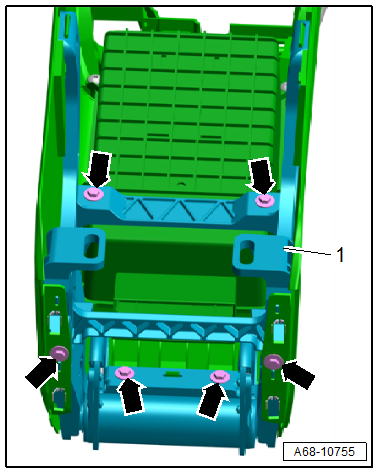
- On the back of the center console -1-, push the sides outward in the direction of -arrows- from the center armrest and remove the center armrest -2-.

Installing
Install in reverse order of removal.
Installation instructions: For example tightening specifications, replacing components. Refer to → Chapter "Overview - Front Center Armrest".
Center Armrest Upper Section, Removing and Installing
Special tools and workshop equipment required
- Pry Lever -80-200-
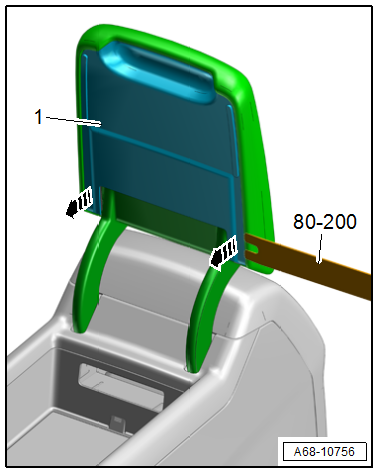
Removing, Version 1
- Flip up the center armrest.
- Starting at the back, unclip the cover -1- from the center armrest in the direction of -arrows- using the Pry Lever -80-200-.
- Unclip the cover completely and remove it.
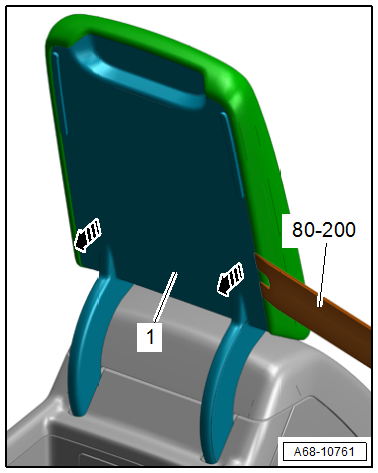
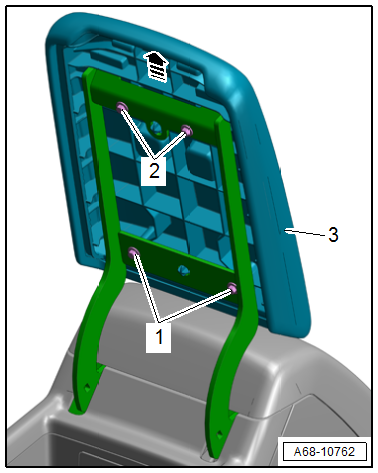
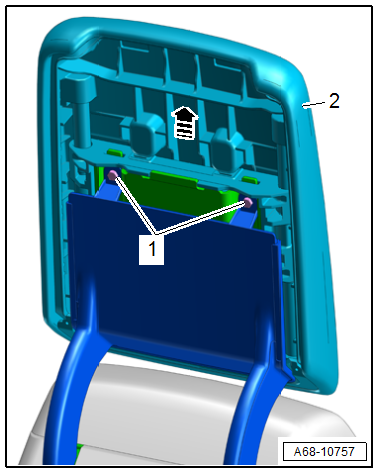
- Remove the bolts -1 and 2-.
- Disengage the center armrest upper section -2- in the direction of -arrow- and remove it.
Removing, Version 2
- Flip up the center armrest.
- Starting at the back, unclip the cover -1- from the center armrest in the direction of -arrows- using the Pry Lever -80-200-.
- Unclip the cover completely and remove it.
- Remove the bolts -1-.
- Disengage the center armrest upper section -2- in the direction of -arrow- and remove it.
Installing
Install in reverse order of removal.
Installation instructions: For example tightening specifications, replacing components. Refer to → Chapter "Overview - Front Center Armrest".
Hinge Arm Trim Panels, Removing and Installing
Special tools and workshop equipment required
- Pry Lever -80-200-
Removing
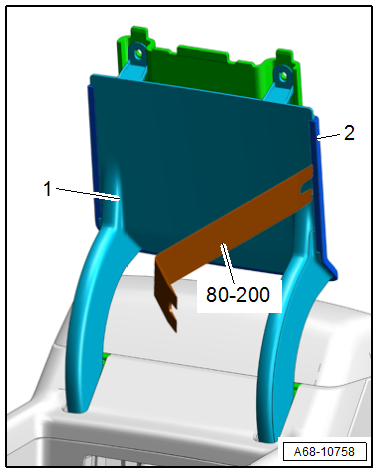
- Remove the center armrest upper section. Refer to → Chapter "Center Armrest Upper Section, Removing and Installing".
- Unclip the rear trim panel -2- at the sides from the front trim panel -1- using the Pry Lever -80-200-.
- Separate the hinge arm trim panels from each other, disengage them at the center armrest support and remove them.
Installing
Install in reverse order of removal.
Installation instructions: For example tightening specifications, replacing components. Refer to → Chapter "Overview - Front Center Armrest".
READ NEXT:
 Interior Rearview Mirror
Overview - Interior Rearview Mirror
1 - Front Cover
For the mirror base
Press on until it engages audibly
2 - Clip
For the interior rearview mirror
Replace after removing t
Seat Belts
Component Location Overview - Seat Belts and Mounting Points
Note
The Avant is shown.
1 - Front Belt End Fitting
Overview. Refer to
→ Chapter "Overview - Front Three-Point
SEE MORE:
Gas-Filled Strut, Removing and Installing
Removing
- Support the lid or secure it against falling.
- Sedan: remove the right luggage compartment side trim panel.
Refer to
→ Body Interior; Rep. Gr.70; Luggage Compartment Trim Panels;
Luggage Compartment Side Trim Panel, Removing and Installing.
- Using a sm
Coolant temperature display
Applies to: vehicles with a coolant temperature indicator
The coolant temperature display (9) only functions when the ignition is
switched on.
To reduce the risk of engine damage, please observe
the following notes about the temperature
ranges.
Cold range
If only the LEDs at the bottom of the gaug
