Audi A4: Glass Panel, Adjusting
Glass Panel, Adjusting, Sedan
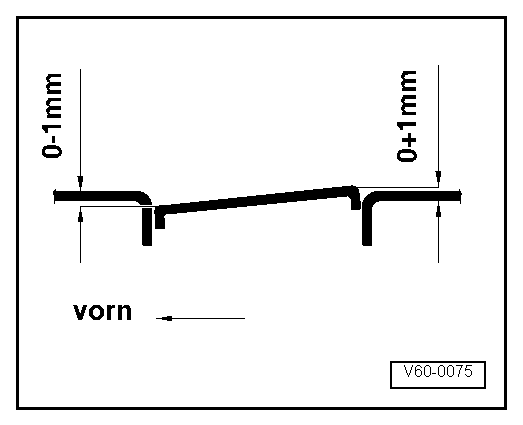
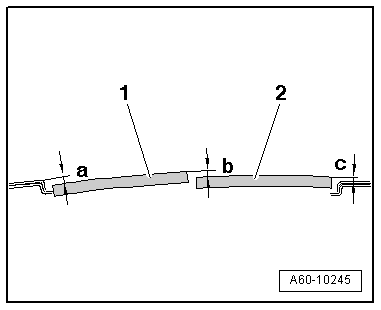
Adjustment Dimensions
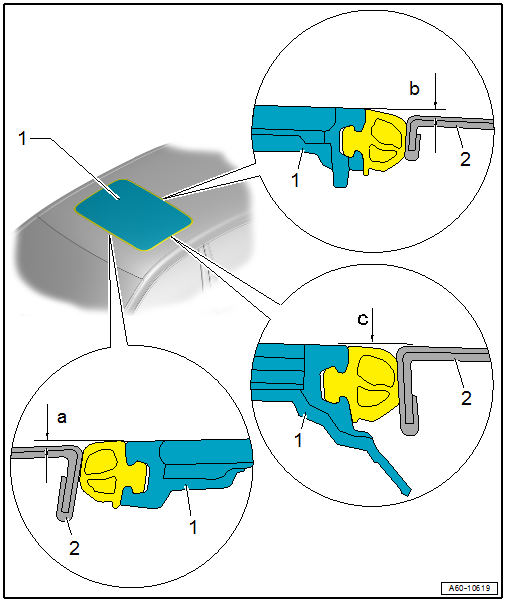
1 - Front Glass Panel
- Dimension -a- = 0 - 1 mm
- Dimension -b- = 0 + 1 mm
- Dimension -c- = 0 mm (flush)
2 - Roof
Height Adjustment
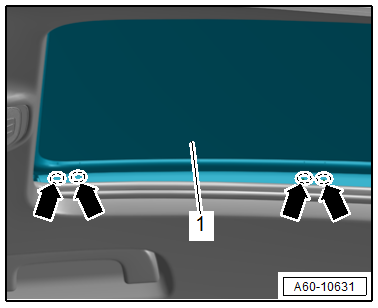
- To achieve the best possible exterior optical characteristics, make sure that the adjustment on left and right sides is performed as evenly (symmetrically) as possible.
- Check the glass panel adjustment using a depth gauge, for example.
- To adjust the height, close the sliding sunroof from the open position (not tilted open).
- Remove the left and right boot. Refer to → Chapter "Boot, Removing and Installing".
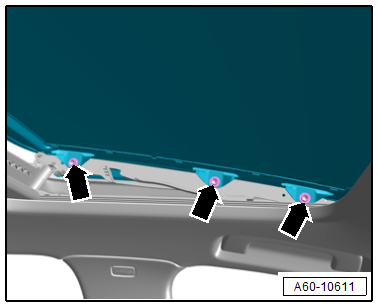
- Loosen the left and right bolts -arrows-.
- Adjust the glass panel in the front area and tighten the front Screw.
- Adjust the glass panel in the rear area and tighten the rear Screw.
- Then tighten the bolts in the center.
- Perform an adaptation. Refer to → Chapter "Power Sunroof Control Module -J245-, Programming".
Tightening Specifications
- Refer to → Chapter "Overview - Sliding Sunroof, Sedan"
Glass Panel, Adjusting, Avant
Adjustment Dimensions
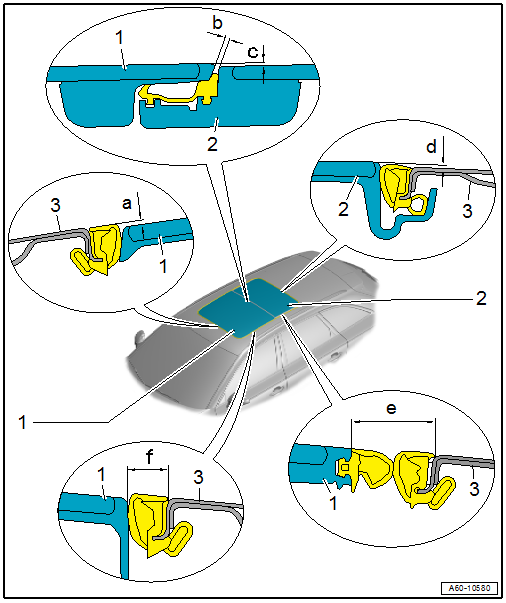
1 - Front Glass Panel
- Dimension -a- = 1.9 +- 1.1 mm
- Dimension -b- = 1.2 +- 0.5 mm
- Dimension -c- = 1.0 +- 0.5 mm
- Dimension -f- = 10 +- 1.2 mm
2 - Rear Glass Panel
- Dimension -d- = 0.3 + 0.7- 0.3 mm
- Dimension -e- = 21.9 +- 1.2 mm
3 - Roof
Height Adjustment
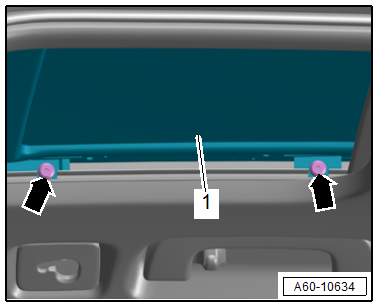
- Only adjust the front glass panel at the front edge and the rear glass panel at the rear edge.
- To achieve the best possible exterior optical characteristics, make sure that the adjustment on left and right sides are performed as evenly (symmetrically) as possible.
- Check the adjustment of the front -1- and rear -2- glass panels with a depth gauge, for example.
- Dimension -a- = 1.9 +- 1.1 mm
- Dimension -b- = 1.0 +- 0.5 mm
- Dimension -c- = 0.3 + 0.7- 0.3 mm
- Remove the left and right inner seal on the side.
- To adjust the front glass panel -1-, reach through the openings in the side rubber trim on the glass panel to loosen both of the front screws -left arrows-.
- Adjust the glass panel and tighten the screws.
- To adjust the rear glass panel -1-, loosen the screws -arrows-.
- Adjust the glass panel and tighten the screws.
- Perform an adaptation. Refer to → Chapter "Power Sunroof Control Module -J245-, Programming".
Tightening Specifications
- Refer to → Chapter "Overview - Sliding Sunroof, Avant"
READ NEXT:
 Power Sunroof Control Module -J245-, Removing and Installing
Removing
- Switch off the ignition.
- Remove the left and right sun visors. Refer to
→ Body Interior; Rep. Gr.68; Equipment; Sun Visor, Removing and
Installing.
- Remo
Sunroof Seals, Removing and Installing
Sunroof Seals, Removing and Installing, Sedan
Removing
- Remove the glass panel. Refer to
→ Chapter "Glass Panel, Removing and Installing, Sedan".
- Remove the seal -2- from the glas
Wind Deflector, Removing and Installing
Wind Deflector, Removing and Installing, Sedan
Removing
- Move the glass panel toward the rear.
- Slightly lift the tab on the bearing -1-
for the wind deflector -2- using a
screwdriver in
SEE MORE:
Voice recognition system
General information
Applies to: vehicles with voice recognition system
You can operate many functions in the vehicle
easily using voice commands.
Using the voice recognition system optimally
Speak clearly and distinctly at a normal volume.
Speak louder when driving faster.
Emphasize the words in
Balance Shaft
Overview - Balance Shaft
1 - Cylinder Block
2 - Bolt
Tightening specifications. Refer to
→ Servicing - 4-Cylinder 2.0L 4V TFSI Engine; Rep. Gr.13; Balance Shaft;
Overview - Balance Shaft.
3 - Intake Side Balance Shaft
Removing and installing. Re
