Audi A4: Rear Bumper Cover Mount, Removing and Installing
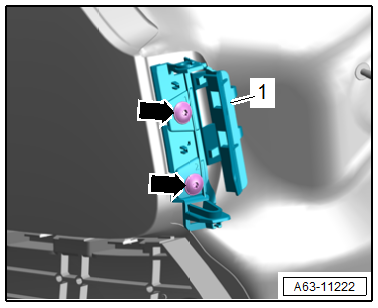
Bumper Cover Mount, Removing and Installing, Upper
Removing
- Remove the rear bumper cover. Refer to → Chapter "Bumper Cover, Removing and Installing".
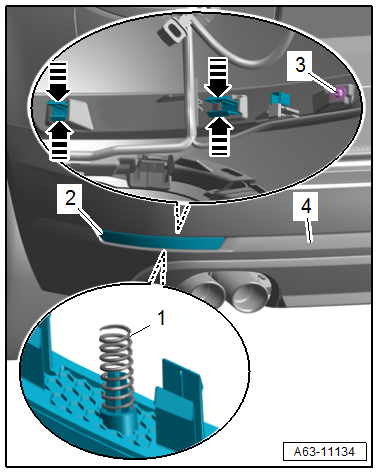
- Remove the bolts -arrows-.
- Remove the upper mount -1-.
Installing
Install in reverse order of removal.
Tightening Specifications
- Refer to → Chapter "Overview - Bumper Cover"
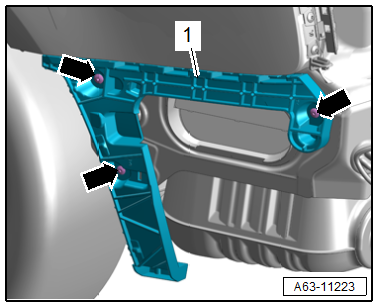
Bumper Cover Mount, Removing and Installing, Side
Removing
- Remove the rear bumper cover. Refer to → Chapter "Bumper Cover, Removing and Installing".
- Remove the bolts -arrows-.
- Remove the side mount -1-.
Installing
Install in reverse order of removal.
Tightening Specifications
- Refer to → Chapter "Overview - Bumper Cover"
Impact Member, Removing and Installing
Impact Member, Removing and Installing, Vehicles without Trailer Hitch
 Caution
This procedure contains mandatory replaceable parts. Refer to component overview and parts catalog prior to starting procedure.
Mandatory Replacement Parts
- Bolt - Impact Member to Body
- The following components must be replaced after removal. Refer to → Chapter "Overview - Impact Member".
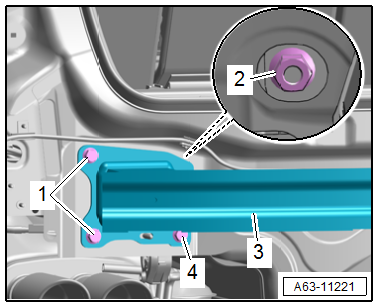
Removing
- Remove the rear bumper cover. Refer to → Chapter "Bumper Cover, Removing and Installing".
- Remove the nut -2- and bolts -1 and 4-.
- Remove the impact member -3-.
Installing
Install in reverse order of removal.
Tightening Specifications
- Refer to → Chapter "Overview - Impact Member"
Impact Member, Removing and Installing, Vehicles with Trailer Hitch
Caution
This procedure contains mandatory replaceable parts. Refer to component overview and parts catalog prior to starting procedure.
Mandatory Replacement Parts
- Bolt - Impact Member to Body
- To complete the procedure, a second technician is required to be at the following position.
Removing
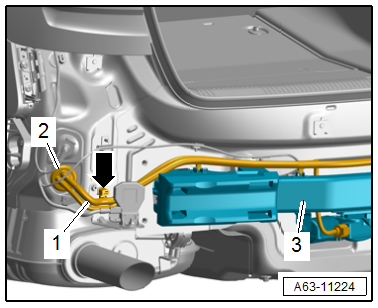
- Remove the rear bumper cover. Refer to → Chapter "Bumper Cover, Removing and Installing".
- Disconnect and free up the connector -3- and ground wire -2-.
- If equipped, push the spare tire well trim slightly to the side.
- Remove the bolts -1-.
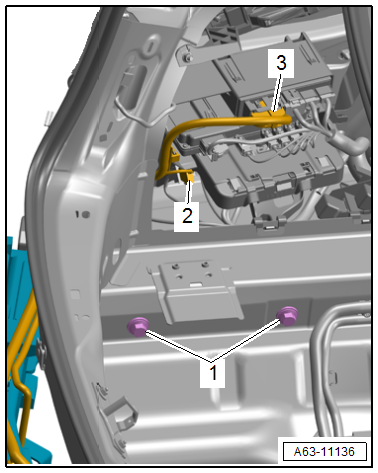
- Press the grommet -2- outward.
- Free up the wiring harnesses -1--arrow- and guide them out of the opening in the body.
- Remove the impact member -3- with a second technician.
Installing
Install in reverse order of removal.
Tightening Specifications
- Refer to → Chapter "Overview - Impact Member"
Attachments, Removing and Installing
Bumper Cover Lower Section, Removing and Installing
Removing
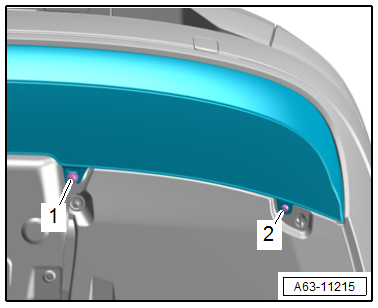
- Remove the nuts -1- and bolt -2-.
- Remove the rear underbody trim panel. Refer to → Chapter "Underbody Trim Panel, Removing and Installing, Side".
- Release the retainers -arrows- and remove the lower section -1- from the bumper cover -2-.
Installing
Install in reverse order of removal and note the following:
- Push the bumper cover lower section into the bumper cover until it clicks into place.
Tightening Specifications
- Refer to → Chapter "Overview - Bumper Cover"
Trim for Bumper Cover Lower Section, Removing and Installing
Removing
- Remove the rear bumper cover. Refer to → Chapter "Bumper Cover, Removing and Installing".
- Remove the reflector. Refer to → Chapter "Reflector, Removing and Installing".
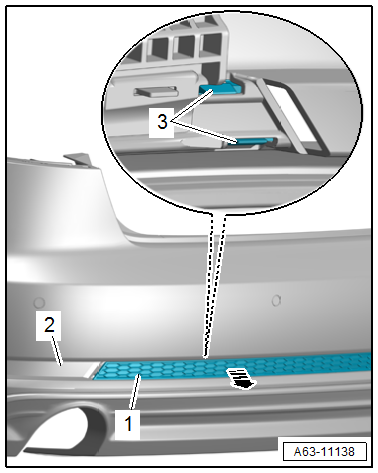
- Release the retainers -3- and remove the trim -1- from the bumper cover -2- in the direction of -arrow-.
Installing
Install in reverse order of removal.
Reflector, Removing and Installing
Removing
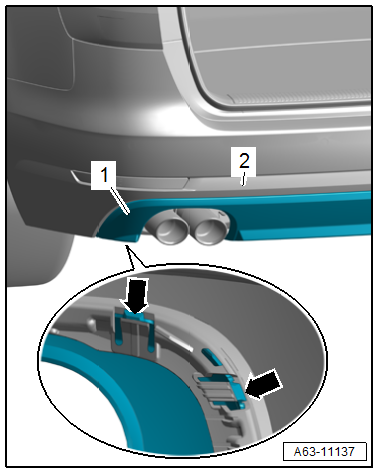
- Right side of the vehicle: Remove the bumper cover. Refer to → Chapter "Bumper Cover, Removing and Installing"
- Remove the bolt -3-.
- Release the retainers in the direction of -arrows-.
- Remove the reflector -2- from the bumper cover -4-.
TIP
The spring force of the spring -1- also assists in the removal of the reflector.
Installing
Install in reverse order of removal.
Tightening Specifications
- Refer to → Chapter "Overview - Bumper Cover"
Special Tools
Special tools and workshop equipment required
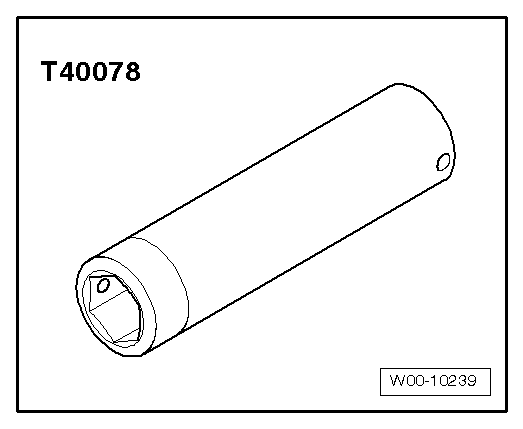
- Body Socket -T40078-
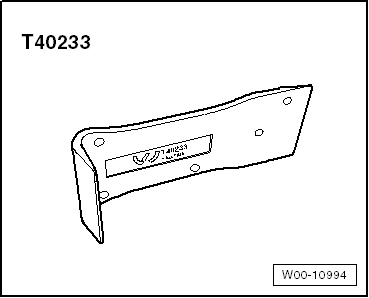
- Removal Wedge -T40233-
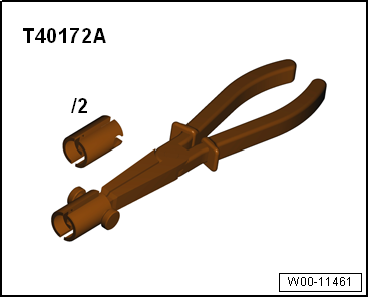
- Pliers -T40172C-
- Adapter -T40172/1-
- Wiring Harness Repair Set - Hot Air Blower -VAS1978/14A-
READ NEXT:
 Repair Information
Minimum Curing Times for Bonded Windows
For safety reasons, use only non-conductive two-part adhesive
when installing windshield and rear window with the materials
listed below.
The vehicle can onl
Windshield
Overview - Windshield
1 -
Windshield
Removing and installing. Refer to
→ Chapter "Windshield, Removing and Installing".
Distance to roof: Dimension -c- = 2.5 mm
Distance to A-pill
SEE MORE:
Wheel Bearing Unit, Servicing
Note
The wheel bearing and wheel hub are currently only delivered
together. As soon as these components are delivered separately,
the following instructions will apply.
Special tools and workshop equipment required
Press Plate -VW401-
Press Plate -VW402-
Press Piece - Multiple Use -VW4
Plenum Chamber Bulkhead, Removing and Installing
Removing
- Remove the engine cover. Refer to
→ Engine Mechanical; Rep. Gr.10; Engine Cover; Engine Cover,
Removing and Installing.
- For vehicles that have a pass-through for the coolant lines
through the plenum chamber bulkhead, drain the coolant. Refer to
→ Eng
