Audi A4: Water Drain Hoses
Overview - Water Drain Hoses
Overview - Front Water Drain Hoses
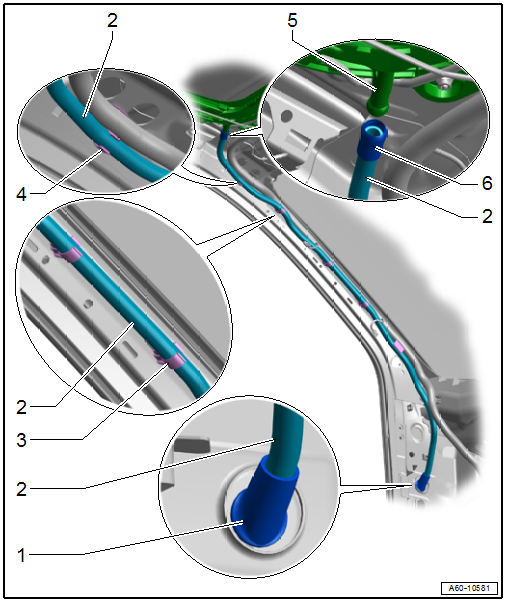
1 - Grommet
- Push all the way into the body using a soap solution
2 - Front Water Drain Hose
- Cleaning. Refer to → Chapter "Water Drain Hoses, Cleaning".
- Removing and installing. Refer to → Chapter "Front Water Drain Hoses, Removing and Installing".
3 - Clip
- For the water drain hose
4 - Clip
- For the water drain hose
- Sedan: different versions for the left and right sides
5 - Connection
- On the sunroof frame
6 - Coupling Piece
- Attach to the connection
Overview - Rear Water Drain Hoses, Sedan
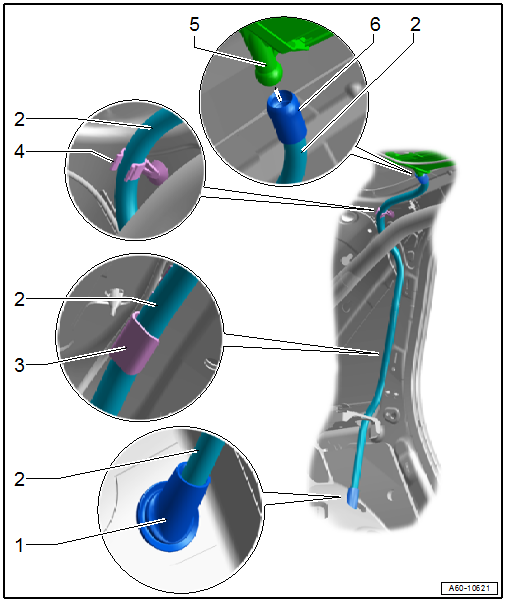
1 - Grommet
- Push all the way into the body using a soap solution
2 - Rear Water Drain Hose
- Cleaning. Refer to → Chapter "Water Drain Hoses, Cleaning".
- Removing and installing. Refer to → Chapter "Rear Water Drain Hoses, Removing and Installing".
3 - Mount
- For the water drain hose
4 - Clip
- For the water drain hose
5 - Connection
- On the sunroof frame
6 - Coupling Piece
- Attach to the connection
Water Drain Hoses, Cleaning
Special tools and workshop equipment required
- Drain Snake -VAS6620-
Front Water Drain Hoses
Routing of front water drain hoses. Refer to → Chapter "Overview - Front Water Drain Hoses".
- Open the sunroof panel.
- Using the -VAS6620-, start cleaning from the upper end of the hose.
Rear Water Drain Hoses
Routing of rear water drain hoses. Refer to → Chapter "Overview - Water Drain Hoses".
- Remove the rear wheel housing liner. Refer to → Chapter "Rear Wheel Housing Liner, Removing and Installing".
- Using the -VAS6620-, start cleaning from the lower end of the hose.
TIP
With the rear glass panel removed, the rear water drain hoses can also be cleaned from above.
Water Drain Hoses, Removing and Installing
Front Water Drain Hoses, Removing and Installing
Special tools and workshop equipment required
- Angled Screwdriver -VAS6416-
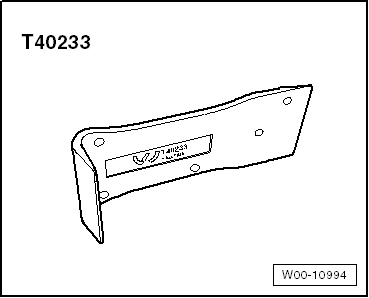
- Removal Wedge -T40233-
Removing
- Remove the front interior lamp/reading lamp. Refer to → Electrical Equipment; Rep. Gr.96; Controls; Front Interior Lamp/Reading Lamp, Removing and Installing.
- Remove the left and right sun visors. Refer to → Body Interior; Rep. Gr.68; Equipment; Sun Visor, Removing and Installing.
- Remove the center support for the sun visor. Refer to → Body Interior; Rep. Gr.68; Vehicle Equipment; Sun Visor Center Support, Removing and Installing.
Versions with Driver Assistance Systems Front Camera
- To unclip the cover in the direction of -arrows A, B and C-, insert the -VAS6416- carefully between the windshield and the cover.
- Repeat the procedure on the opposite side.
- Disengage the front of the cover -1- and remove it toward the rear.
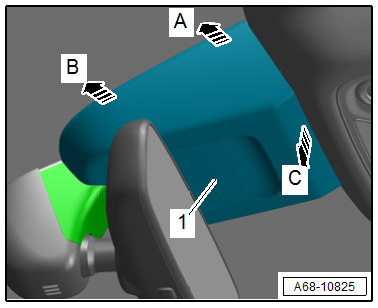
Continuation for All Vehicles
- Remove the left and right A-pillar trim panel. Refer to → Body Interior; Rep. Gr.70; Vehicle Interior Trim Panels; A-Pillar Trim Panel, Removing and Installing.
- Driver side: Remove the mount for the Vehicle Electrical System Control Module -J519-. Refer to → Electrical Equipment; Rep. Gr.97; Control Modules; Vehicle Electrical System Control ModuleJ519, Removing and Installing.
- Front passenger side: Remove the glove compartment. Refer to → Body Interior; Rep. Gr.68; Storage Compartments and Covers; Glove Compartment, Removing and Installing.
- Remove the left and right front roof grab handle. Refer to → Body Interior; Rep. Gr.68; Equipment; Roof Grab Handle, Removing and Installing.
- Remove the left and right B-pillar upper trim panel. Refer to → Body Interior; Rep. Gr.70; Vehicle Interior Trim Panels; B-Pillar Trim Panel, Removing and Installing.
- Open the sun shade.
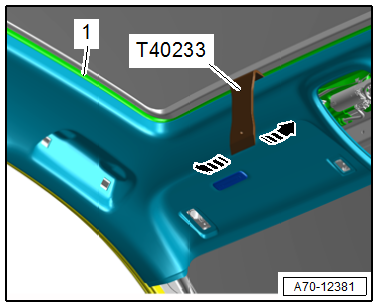
- To avoid dirtying the headliner, clean the -T40233-.
- Push the -T40233- between the frame -1- for the sliding sunroof and the headliner.
- Using the -T40233-, loosen the headliner at the front from the frame for the sliding sunroof -arrows-.
- Lower the headliner on the corresponding side.
- Remove the water drain hose from the sliding sunroof and free it up at the clips and guides.
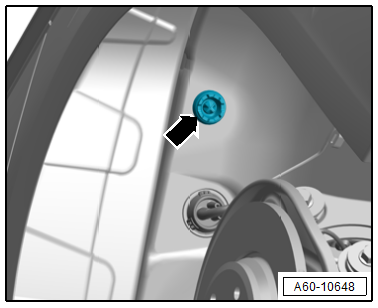
- For guiding the new water drain hose in later, insert an approximately 500 mm (19.6 in.) long wire through the grommet -arrow- into the water drain hose.
- Loosen the grommet on the A-pillar and remove it from the water drain hose.
- Remove the water drain hose toward the inside while holding the wire at the same time.
Installing
Install in reverse order of removal and note the following:
- Insert the water drain hose using the guide wire.
- Push the grommet onto the water drain hose and carefully insert it into the plenum chamber.
- Engage the water drain hose into all clips and guides.
- The marking on the hose must rest above the windshield in the clip.

Rear Water Drain Hoses, Removing and Installing
Special tools and workshop equipment required
- Removal Wedge -T40233-
Removing
- Remove the D-pillar trim panels on the affected side. Refer to → Body Interior; Rep. Gr.70; Vehicle Interior Trim Panels; D-Pillar Trim Panel, Removing and Installing.
- Remove the C-pillar trim panel on the affected side. Refer to → Body Interior; Rep. Gr.70; Vehicle Interior Trim Panels; C-Pillar Trim Panel, Removing and Installing.
- Remove the roof grab handle from the affected side. Refer to → Body Interior; Rep. Gr.68; Equipment; Roof Grab Handle, Removing and Installing.
- To avoid dirtying the headliner, clean the -T40233-.
- Push the -T40233- between the frame -1- for the sliding sunroof and the headliner.
- Using the -T40233-, loosen the headliner at the rear from the frame for the sliding sunroof in the direction of -arrows-.
- Lower the headliner on the corresponding side.
- Remove the rear wheel housing liner from the corresponding side. Refer to → Chapter "Rear Wheel Housing Liner, Removing and Installing".
- Disengage the grommet -arrow- from the rear wheel housing.
- Remove the water drain hose.
Installing
Install in reverse order of removal and note the following:
- Insert the water drain hose using the guide wire.
- Push the grommet onto the water drain hose and carefully insert it into the plenum chamber.
- Engage the water drain hose into all clips and guides.
- The marking on the hose must come to rest in the upper clip on the rear side window.
- Insert the grommet carefully into the wheel housing.
Special Tools
Special tools and workshop equipment required
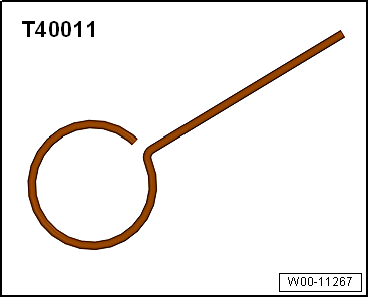
- Locking Pin (3 pc.) -T40011-
- Removal Wedge -T40233-
- Wiring Harness Repair Set - Hot Air Blower -VAS1978/14A-
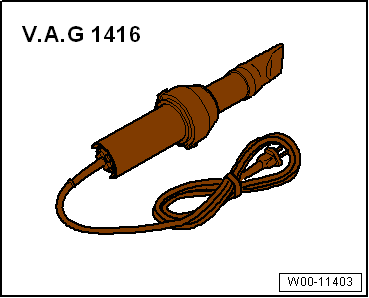
- Angled Screwdriver -VAS6416-
- Drain Snake -VAS6620-

- Roller -3356-
- Not illustrated:
- Pry Lever -80-200-
READ NEXT:
 Front Bumper
Overview - Bumper Cover
1 -
Towing Eye Cover
2 -
Bumper Cover
Removing and installing. Refer to
→ Chapter "Bumper Cover, Removing and Installing".
Adjusting. Refer to
Front Bumper Cover, Removing and Installing
To complete the procedure, a second technician is required to be at the
following position.
Special tools and workshop equipment
required
Pliers -T40172C-
Adapter -T40172/1-
Removing
- Push
SEE MORE:
Receiver/Dryer or Accumulator and Restrictor, Replacing after Cleaning
Refrigerant Circuit
Note
Cleaning the refrigerant circuit means flushing it with
refrigerant R134a. Refer to
→ Chapter "Refrigerant Circuit, Cleaning (Flushing), with
Refrigerant R134a" or blowing through with compressed
air and nitrogen. Refer to
→ Chapter "Refrigerant Circuit, Flushing with
Transmission, Removing
Special tools and workshop equipment required
Hose Clamps - Up To 25 mm -3094-
Torque Wrench 1332 Insert - Ring Wrench - 16mm -VAG1332/14-
Engine and Gearbox Jack -VAS6931-
Torque Wrench Adapter -VAS6948-
Gearbox Support -T40173-
Wrench - 21mm -T40263-
Adapter -T40314-
Tensioning Strap -T10
