Audi A4: Door Handle, Removing and Installing
Removing
- Remove the door handle trim. Refer to → Chapter "Door Handle Trim, Removing and Installing".
- If equipped, remove the exterior door handle illumination bulb. Refer to → Electrical Equipment; Rep. Gr.94; Exterior Door Handle Lamps; Exterior Door Handle Illumination Bulb, Removing and Installing.
- If equipped, remove the front exterior door handle switch. Refer to → Electrical Equipment; Rep. Gr.94; Access/Start Authorization; Front Exterior Door Handle Switch, Removing and Installing.
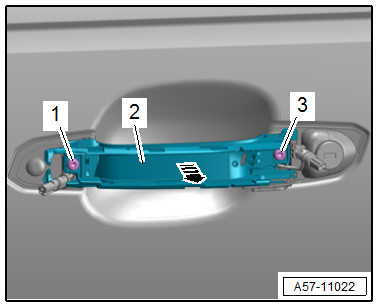
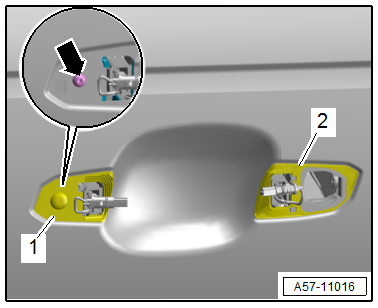
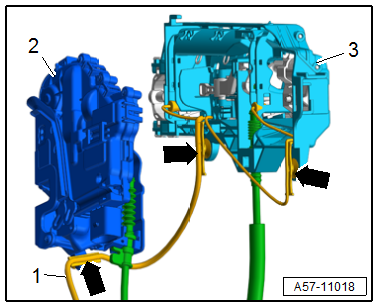
- Remove the bolts -1 and 3-.
- Remove the door handle -2- from the mounting bracket in the direction of -arrow-.
Installing
Install in reverse order of removal.
Tightening Specifications
- Refer to → Chapter "Overview - Door Handle and Door Lock"
Door Handle Trim, Removing and Installing
Special tools and workshop equipment required
- Angled Screwdriver -VAS6543-
Removing
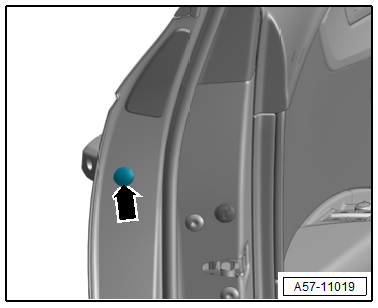
- Remove the cap -arrow-.
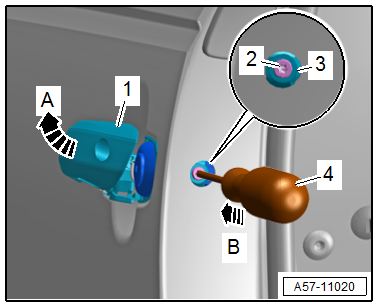
- Pull the door handle -1- all the way in the direction of -arrow A- and hold it.
- Remove the clamping screw -2- all the way using a screwdriver -4-.
- Push the housing retaining bracket -3- inward until it engages in the direction of -arrow B-.
- The door handle is now locked in the "open" position.
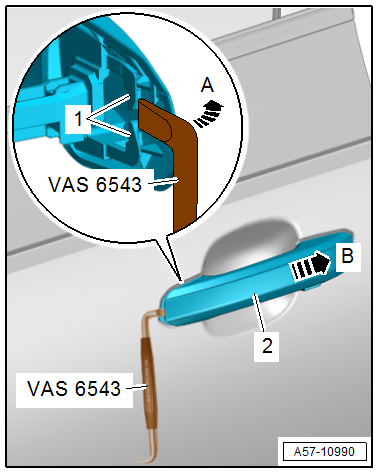
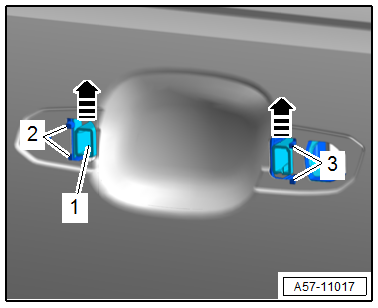
- Using the -VAS6543-, release the retainers -1- in the direction of -arrow A- and push the trim -2- in the direction of -arrow B- at the same time.
- Remove the door handle trim.
Installing
Install in reverse order of removal and note the following:
- Position the trim on the door handle and push it forward in the direction of travel until it engages audibly.
Tightening Specifications
- Refer to → Chapter "Overview - Door Handle and Door Lock"
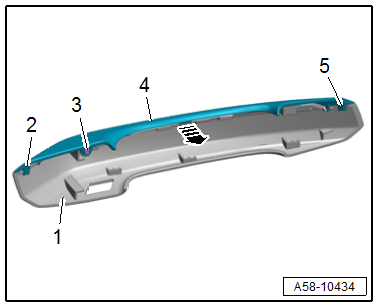
Door Handle Trim Molding, Removing and Installing
Removing
- Remove the door handle trim. Refer to → Chapter "Door Handle Trim, Removing and Installing".
- Remove the bolt -3-.
- Release the retainers -2 and 5-.
- Remove the trim molding -4- from the door handle trim -1- in the direction of -arrow-.
Installing
Install in reverse order of removal.
Tightening Specifications
- Refer to → Chapter "Overview - Door Handle and Door Lock"
Mounting Bracket, Removing and Installing
 NOTICE
Risk of damaging the operating cable by deforming it.
- Never sharply bend or kink the operating cable.
Removing
- Move the door window into the "closed" position.
- Remove the door handle. Refer to → Chapter "Door Handle, Removing and Installing".
- Remove the housing. Refer to → Chapter "Housing, Removing and Installing".
- Remove the door inner cover. Refer to → Chapter "Door Inner Cover, Removing and Installing".
- Remove the backing plates -1 and 2-.
- Remove the bolt -arrow-.
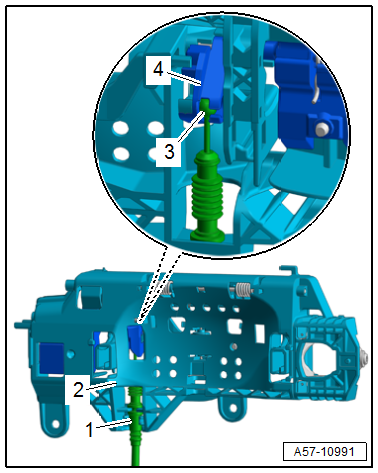
- Lift the mounting brackets -1- until the retainers -2 and 3- are free in the direction of -arrows-.
- Free up the wiring harness.
- Remove the mounting bracket toward the inside.
- Loosen the operating cable -1- from the support bracket -2- and disengage the release cable nipple -3- from the release lever -4-.
- Remove the mounting bracket from the door.
Installing
Install in reverse order of removal and note the following:
- Equipped on some models: The wiring harness -1- for the exterior door handle touch sensor/exterior door handle illumination must be routed on the mounting bracket -3- and on the door lock -2- as shown -arrows-.
TIP
If the wiring harness is not routed correctly, there may be noises when opening and closing the door window, because the door window grazes the wiring harness.
Tightening Specifications
- Refer to → Chapter "Overview - Door Handle and Door Lock"
READ NEXT:
 Door Lock Cable, Removing and Installing
NOTICE
Risk of damaging the operating cable by deforming it.
- Never sharply bend or kink the operating cable.
Removing
- Remove the door window guide rail. Refer to
→ Chapte
Window Guide, Removing and Installing
Removing
- Remove the window frame trim panel. Refer to
→ Body Interior; Rep. Gr.70; Rear Door Trim Panels; Window Frame
Trim Panel, Removing and Installing.
- Remove the B
SEE MORE:
Component Location Overview - Infotainment System
1 - Bracket
2 - Information Electronics Control Module 1 -J794-
Connector assignment. Refer to
→ Wiring diagrams, Troubleshooting & Component locations.
Removing and installing. Refer to
→ Chapter "Information Electronics Control Module 1 -J794-, Removing
Wheel Bearing Unit, Servicing
Note
The wheel bearing and wheel hub are currently only delivered
together. As soon as these components are delivered separately,
the following instructions will apply.
Special tools and workshop equipment required
Press Plate -VW401-
Press Plate -VW402-
Press Piece - Multiple Use -VW4
