Audi A4: Window Guide, Removing and Installing
Removing
- Remove the window frame trim panel. Refer to → Body Interior; Rep. Gr.70; Rear Door Trim Panels; Window Frame Trim Panel, Removing and Installing.
- Remove the B-pillar trim. Refer to → Chapter "B-Pillar Door Trim, Removing and Installing, Rear".
- Remove the C-pillar trim. Refer to → Chapter "Door C-Pillar Trim, Removing and Installing".
- Remove the rear door window. Refer to → Chapter "Rear Door Window, Removing and Installing".
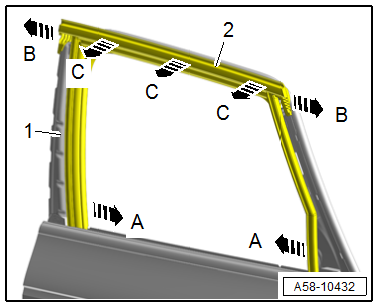
- Pull the window guide -2- out of the guide rails in the direction of -arrows A-.
- Remove the window guide corners in the direction of -arrows B-.
- Starting at the front, pull the window guide out of the guide, working outward from the door flange -1- in the direction of -arrows C-.
Installing
Install in reverse order of removal and note the following:
- Install the window guide on the door flange in the sequence -1 through 5-.
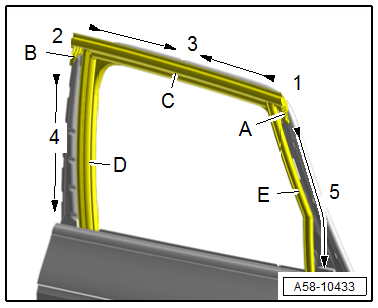
- Position the upper window guide corner -A- on the C-pillar door flange and align it with the C-pillar trim by installing the C-pillar trim without using screws.
- Position the upper window guide corner -B- on the B-pillar door flange and align it with the B-pillar trim by installing the B-pillar trim without using screws.
- Push on the upper window guide -C-, working from the outside toward the inside.
- Align the window guide -D- on the B-pillar guide rail and insert it into the guide rail.
- Align the window guide -E- on the C-pillar guide rail and insert it into the guide rail.
Door Window Guide Rail, Removing and Installing
Removing
- Move the door window into the "open" position.
- Remove the window frame trim panel. Refer to → Body Interior; Rep. Gr.70; Rear Door Trim Panels; Window Frame Trim Panel, Removing and Installing.
- Remove the door inner cover. Refer to → Chapter "Door Inner Cover, Removing and Installing".
- Remove the window regulator motor. Refer to → Chapter "Window Regulator Motor, Removing and Installing".
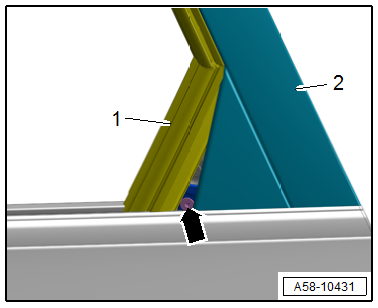
- Pull the window guide -1- away from the C-pillar trim -2- slightly.
- Remove the bolt -arrow- for the guide rail and push the window guide into the C-pillar trim guide.
- Move the door window into the "closed" position.
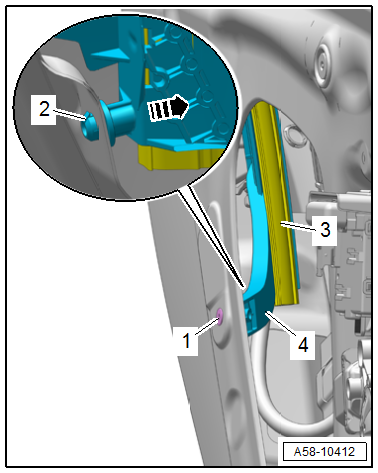
- Remove the window guide -3- from the guide rail -4-.
- Remove the bolt -1-.
- Remove the guide rail forward in the direction of -arrow-. Doing so loosens the retainer -2-.
- Remove the guide rail.
Installing
Install in reverse order of removal.
Tightening Specifications
- Refer to → Chapter "Overview - Window Guides and Window Shaft Strips"
Inner Window Shaft Strip, Removing and Installing
Removing
- Remove the window frame trim panel. Refer to → Body Interior; Rep. Gr.70; Rear Door Trim Panels; Window Frame Trim Panel, Removing and Installing.
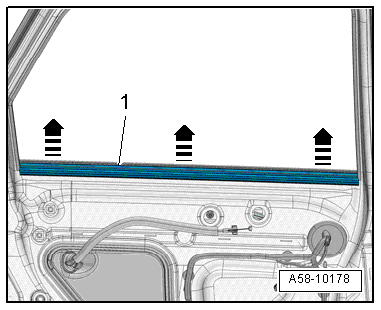
- Remove the window shaft strip -1- upward in the direction of -arrows-.
Installing
Install in reverse order of removal and note the following:
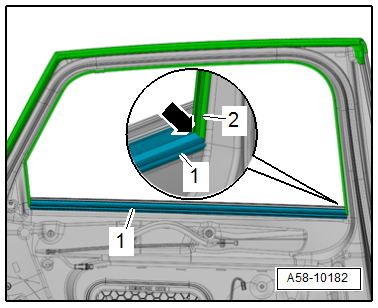
- Position the window shaft strip -1- on the window guide edge -2- at both ends -arrow- and press to the center of the door fold.
Outer Window Shaft Strip, Removing and Installing
Special tools and workshop equipment required
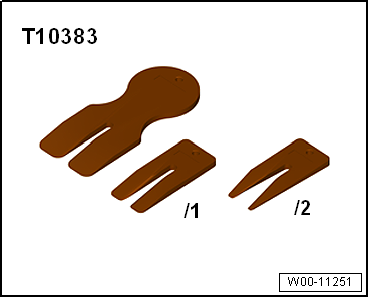
- Wedge Set -T10383-
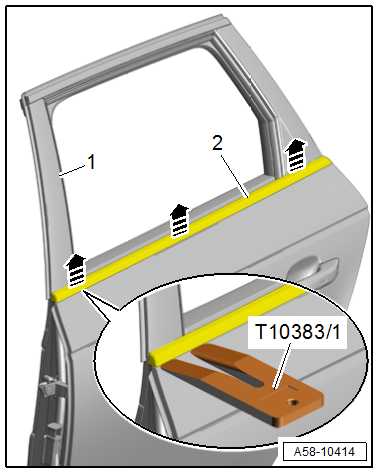
- Wedge 1 -T10383/1-
Removing
- Move the door window into the "open" position.
- Using the -T10383/1-, carefully remove the window shaft strip -2- at the B-pillar trim -1- upward from the door flange -arrows-.
- Remove the window shaft strip.
Installing
Install in reverse order of removal and note the following:
TIP
The lower edge of the window shaft strip can be coated with tire mounting paste for installation.
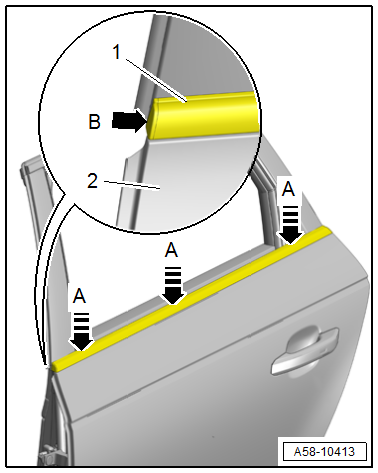
- Align the window shaft strip -1- flush to the door body -2- in -arrow B- and attach it on the door flange all the way to the A-pillar in the direction of -A arrows-.
Special Tools
Special tools and workshop equipment required
- Wedge Set -T10383-
- Wedge 1 -T10383/1-
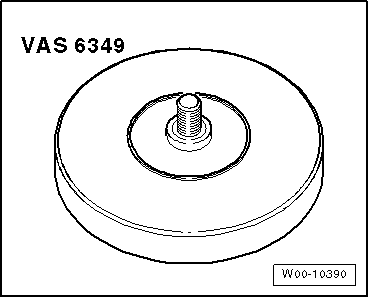
- Adhesive Strip Remover -VAS6349-
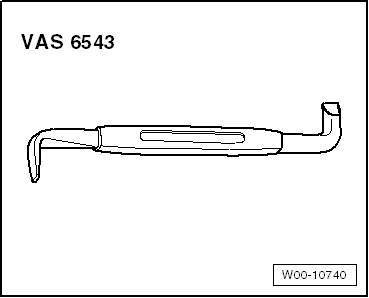
- Angled Screwdriver -VAS6543-
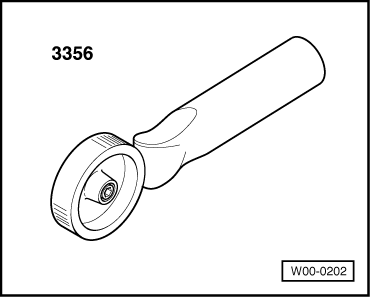
- Roller -3356-
- Gauge - Gap Adjustment -3371-
- Template -T40038/20-
READ NEXT:
 Sliding Sunroof
Overview - Sliding Sunroof
Overview - Sliding Sunroof, Sedan
1 -
Screw
3 Nm
Quantity: 2
2 -
Sunroof Motor -V1-
Removing and installing. Refer to
→ Chapter "Sunroof Mo
Sunroof Frame, Removing and Installing
Sunroof Frame, Removing and Installing, Sedan
Caution
This procedure contains mandatory replaceable parts.
Refer to component overview and parts catalog prior to
starting procedure.
Mandato
SEE MORE:
Driver Front Airbag Crash Sensor -G283-, Removing and Installing
Note
The Passenger Side Front Airbag Crash Sensor -G284- is removed
and installed the same way.
Removing
WARNING
Risk of injury due to involuntary deployment.
Pay attention to the safety precautions when working
with pyrotechnic components. Refer to
→ Chapter "Safety Precau
Rear Seat Belt Guide, Removing and Installing
Seat Belt Guide in Rear Seat Backrest, Removing and Installing
Special tools and workshop equipment required
Trim Removal Wedge -3409-
Removing
- Remove the center rear belt end fitting. Refer to
→ Chapter "Rear Seat Belt Latch, Removing and Installing".
- Release the catches -1-
