Audi A4: Front Door Trim Panel, Removing and Installing
Special tools and workshop equipment required
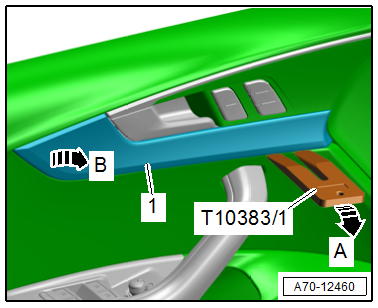
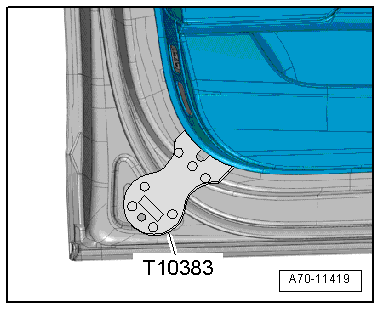
- Wedge Set -T10383-
- Wedge Set - Wedge 1 -T10383/1-
Removing
- Switch off the ignition.
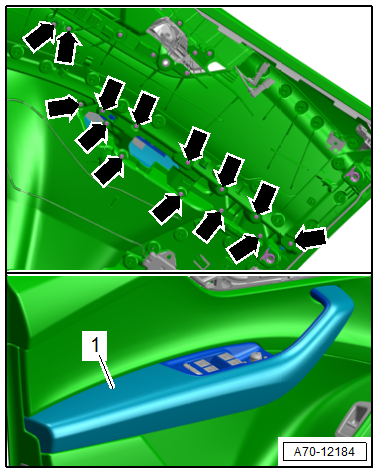
- Unclip the decorative trim -1- using the -T10383/1- in the direction of -arrow A-.
- Release the remaining retainers, disengage the decorative trim from the door trim panel in the direction of -arrow B- and remove it.
- Remove the bolts -arrows-.
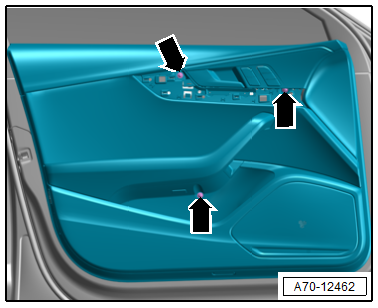
- Using the -T10383-, unclip the door trim panel at the lower rear section in a radius beginning from the door by inserting the wedge between the door trim panel and the door near the clips.
Unclip the remaining clips -2- along the door trim panel from the door. The markings indicate the position of the clips.
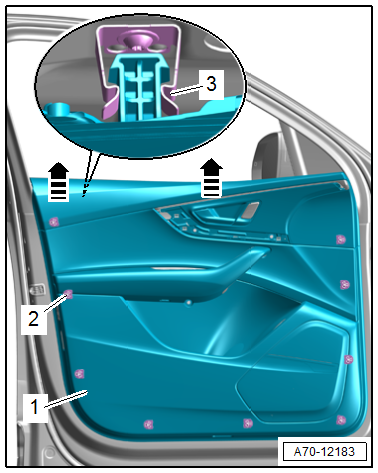
- Pull the door trim panel -1- slightly off the door all the way around.
- The clips must not be left inside the door.
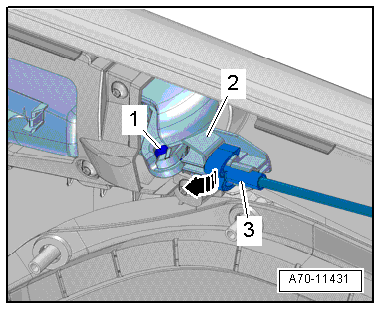
- Press the door trim panel upward out of the clip -3- and disengage from the door on the window shaft in the direction of -arrows-.
- Unclip the cable -3- carefully from the interior door mechanism -2-.
- Tilt the interior door mechanism cable toward the inside in the direction of -arrow-.
- Disengage the ends of the cable -1- from the interior door mechanism.
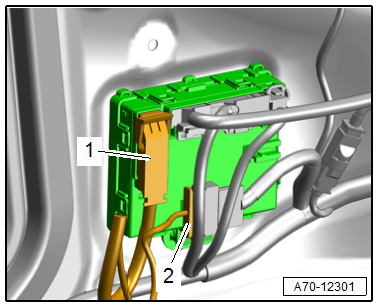
- Disconnect the connectors -1 and 2- from the door control module by pressing the release.
- Equipped on some models: Disconnect the connector for the midrange speaker.
- Remove the door trim panel.
Installing
Install in reverse order of removal and note the following:
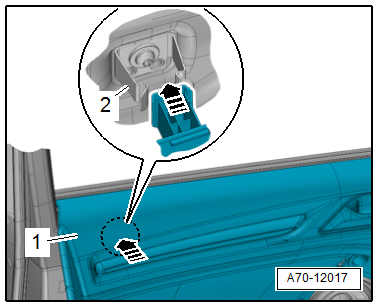
- Position the door trim on the window recess and press it down firmly.
- Carefully position the door trim panel clips -2- all around the door -1- and press the door trim panel onto the door until it engages audibly on the mounting points in the direction of -arrows-.
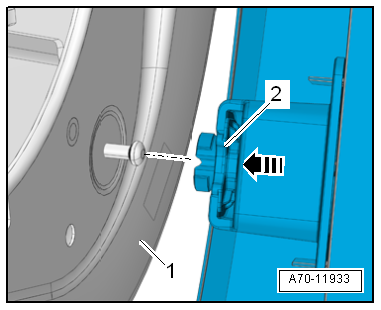
- Engage the door trim -1- in the clamp -2-, to do so the push the door trim on the door at the indicated point in the direction of -arrows-.
Installation instructions: For example tightening specifications, replacing components. Refer to → Chapter "Overview - Front Door Trim Panel".
Front Pull Handle, Removing and Installing
Special tools and workshop equipment required
- Wedge Set -T10383-
- Wedge Set - Wedge 1 -T10383/1-
Removing
- Remove the door trim panel. Refer to → Chapter "Front Door Trim Panel, Removing and Installing".
- Place the door trim panel on a soft surface.
- Disconnect the connectors at the rear of the door trim panel.
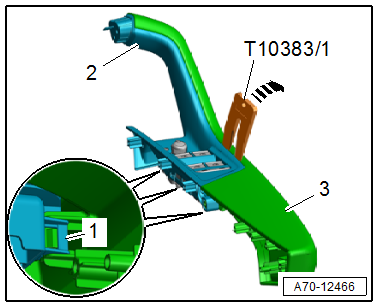
- Remove the bolts -arrows-.
- Remove the pull handle with the armrest -1- from the door trim panel.
- Release the retainers -1- using a small screwdriver. At the same time, unclip the switch mount -2- from the pull handle -3- using the -T10383/1- in the direction of -arrow-.
- Release the remaining retainers and remove the switch mount.
Installing
Install in reverse order of removal.
Installation instructions: For example tightening specifications, replacing components. Refer to → Chapter "Overview - Front Door Trim Panel".
READ NEXT:
 Interior Door Mechanism, Removing and Installing
Removing
- Remove the door trim panel. Refer to
→ Chapter "Front Door Trim Panel, Removing and Installing".
- Place the door trim panel on a soft surface.
- Equipped on some mod
Rear Door Trim Panels
Overview - Rear Door Trim Panel
1 - Bolt
2.5 Nm
For door trim panel
Quantity: 3
2 - Rear Entry Lamp
Driver Side Rear Entry Lamp -W83-
Passenger Side Rear Entry Lamp -W84-
Speaker Trim in Door Trim Panels, Removing and Installing
Special tools and workshop equipment required
Pry Lever -80-200-
Front Bass Speaker Trim, Removing
- Carefully pry out the speaker trim -1-
along the door trim panel seam using the Pry Lever
SEE MORE:
Seat Belt Height Adjuster, Removing and Installing
Caution
This procedure contains mandatory replaceable parts.
Refer to component overview and parts catalog prior to
starting procedure.
Mandatory Replacement Parts
Bolt - Seat Belt Guide to Seat Belt Height Adjuster (Replace
bolt if it was removed because of an accident when the seat b
Special Tools
Special tools and workshop equipment required
Shock Absorber Set -T10001-
Tensioning Strap -T10038-
Tripod Joint Tool -T10065-
Engine/Gearbox Jack Adapter - Wheel Hub Support -T10149-
Hydraulic Press - Bushing Assembly Tool Kit -T10230-
Socket AF 24 mm -T10361A-
Triple Roll
