Audi A4: Rear Door Trim Panel, Removing and Installing
Special tools and workshop equipment required
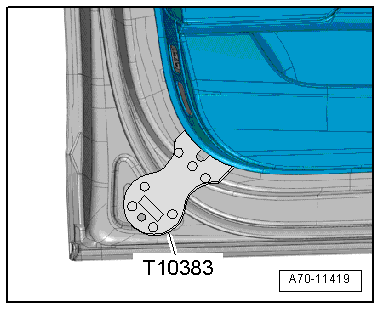
- Wedge Set -T10383-
- Wedge Set - Wedge 1 -T10383/1-
Removing
- Switch off the ignition.
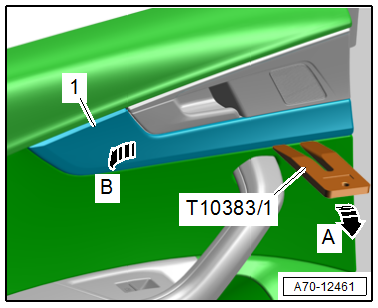
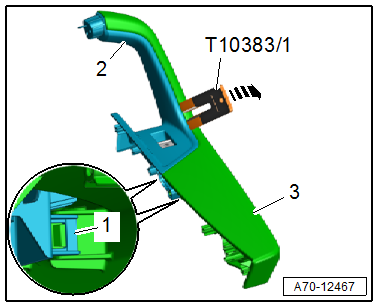
- Unclip the decorative trim -1- using the -T10383/1- in the direction of -arrow A-.
- Release the remaining retainers, disengage the decorative trim from the door trim panel in the direction of -arrow B- and remove it.
- Remove the bolts -arrows-.
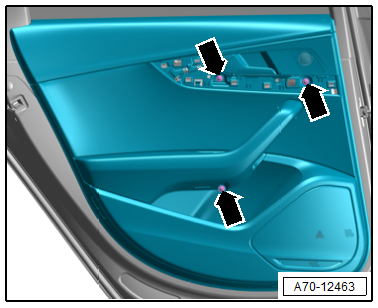
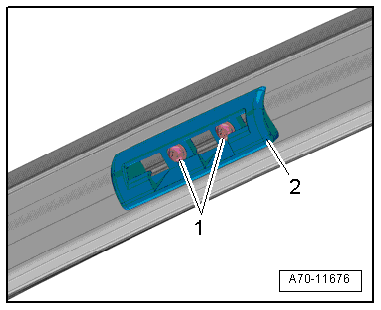
- Using the -T10383- unclip at lower rear in the radius beginning from the door by inserting the wedge between door trim and door in the area of the clip.
Unclip the remaining clips -1- along the door trim panel from the door, the mark shows the position of the clips.
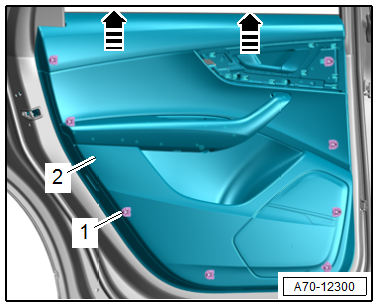
- Pull the door trim panel -2- slightly off the door all the way around.
- The clips must not be left inside the door.
- Disengage and remove the upper door trim panel on the window recess from the door -arrows-.
- Vehicles equipped with a speaker: Disconnect the connector for the speaker.
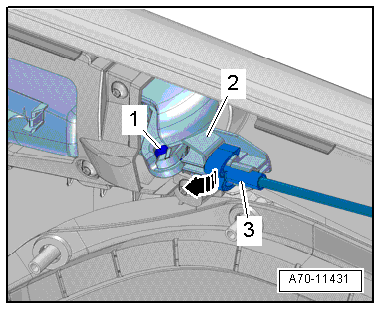
- Unclip the cable -3- carefully from the interior door mechanism -2-.
- Swivel the interior door mechanism cable in the direction of -arrow-.
- Disengage the ends of the cable -1- from the interior door mechanism.
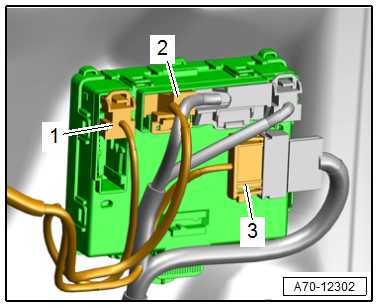
- Disconnect the connectors -1, 2 and 3- from the door control module by pressing the release.
- Remove the door trim panel.
Installing
Install in reverse order of removal. Note the following:
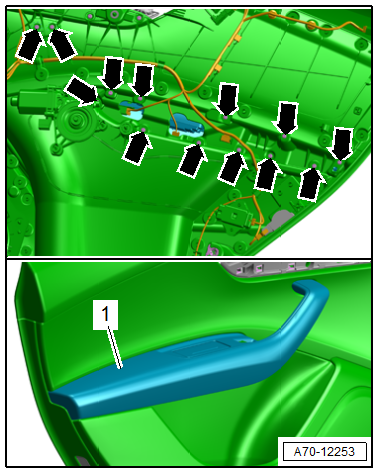
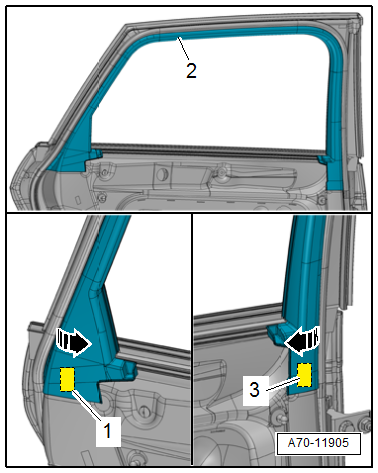
- Position the door trim on the window recess and press it down firmly.
- Carefully position the door trim panel clips -2- all around the door -1- and press the door trim panel onto the door until it engages audibly on the mounting points in the direction of -arrows-.
Installation instructions: For example tightening specifications, replacing components. Refer to → Chapter "Overview - Rear Door Trim Panel".
Rear Pull Handle, Removing and Installing
Special tools and workshop equipment required
- Wedge Set -T10383-
- Wedge Set - Wedge 1 -T10383/1-
Removing
- Remove the door trim panel. Refer to → Chapter "Rear Door Trim Panel, Removing and Installing".
- Place the door trim panel on a soft surface.
- Disconnect the connectors at the rear of the door trim panel.
- Remove the bolts -arrows-.
- Remove the pull handle with the armrest -1- from the door trim panel.
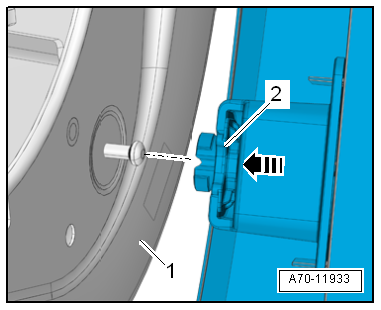
- Release the retainers -1- using a small screwdriver. At the same time, unclip the switch mount -2- from the pull handle -3- using the -T10383/1--arrow-.
- Release the remaining retainers and remove the switch mount.
Installing
Install in reverse order of removal.
Installation instructions: For example tightening specifications, replacing components. Refer to → Chapter "Overview - Rear Door Trim Panel".
Window Frame Trim Panel, Removing and Installing
Special tools and workshop equipment required
- Trim Removal Wedge -3409-
Removing
- Lower the door window.
- Remove the door trim panel. Refer to → Chapter "Rear Door Trim Panel, Removing and Installing".
- Equipped on some models: Remove the screws -1- and remove the mounting eye -2- from the window frame.
- Loosen the trim on the ends from the adhesive pads -1 and 3- from the door, using the -3409-.
- Pry off the window frame trim -2- starting at the bottom and working along the length of the window guide to the upper rear -arrows-.
- Remove the trim downward from the window frame.
Installing
- Insert window frame trim -2- at upper front in the window guide -1- in the direction of -arrow-.
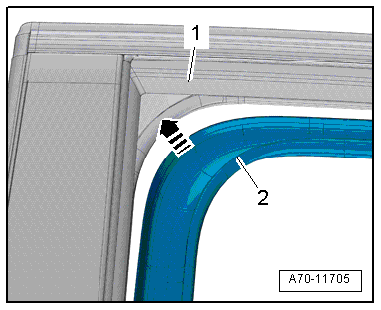
- Install window frame trim -2- along the entire length of the window guide.
- Remove all new part protective foil from the adhesive pads.
- Push the trim in the area of the adhesive pads firmly -1 and 3- against the door.
 Note
Note
Ignore the -arrows-.
Further installation is the reverse order of removal.
Installation instructions: For example tightening specifications, replacing components. Refer to → Chapter "Overview - Rear Door Trim Panel".
READ NEXT:
 Instrument Panel
Overview - Instrument Panel
1 - Screw/Expanding Clip
1.5 Nm
2 - Light Switch Trim
Removing and installing. Refer to
→ Chapter "Light Switch Trim, Removing and Install
Instrument Panel Side Cover, Removing and Installing
Special tools and workshop equipment required
Trim Removal Wedge -3409-
Removing
- Pry off the cover -1- for the
instrument panel side cover using the -3409- in the direction of
-arrow-.
-&nb
Instrument Panel, Removing and Installing
Removing
- Move the steering wheel as far to the rear and down as possible.
Use the full steering column adjustment range for this.
- Move the front seats all the way back and tilt backrest
SEE MORE:
Release Cable, Removing and Installing
Latch Release Cable, Removing and Installing
Removing
- Remove the vehicle electrical system control module bracket.
Refer to
→ Electrical Equipment; Rep. Gr.97; Relay Panels, Fuse Panels,
E-boxes; Component Location Overview - Relay Panels, Fuse
Panels, E-boxes.
- Loo
Door Arrester, Removing and Installing
Removing
- Move the door window into the "closed" position.
- Remove the door trim panel. Refer to
→ Body Interior; Rep. Gr.70; Front Door Trim Panels; Front Door
Trim Panel, Removing and Installing.
- Remove the speaker. Refer to
→ Communication; Rep.
