Audi A4: Rear Window, Removing and Installing
Undamaged Rear Window, Removing and Installing, Sedan
Special tools and workshop equipment required
- Cutting Tool for Bonded Windows -VAS6452-
- Cutting Tool for Bonded Windows - Wire Reel -VAS6452/1-
- Read the repair information. Refer to → Chapter "Repair Information"
- Required tools and materials for removal and installation. Refer to → Chapter "Required Tools and Materials for Removal and Installation".
- Remove the D-pillar trim panel. Refer to → Body Interior; Rep. Gr.70; Vehicle Interior Trim Panels; D-Pillar Trim Panel, Removing and Installing.
- Remove the high-mounted brake lamp. Refer to → Electrical Equipment; Rep. Gr.94; High-Mounted Brake Lamp; High-Mounted Brake Lamp Bulb, Removing and Installing.
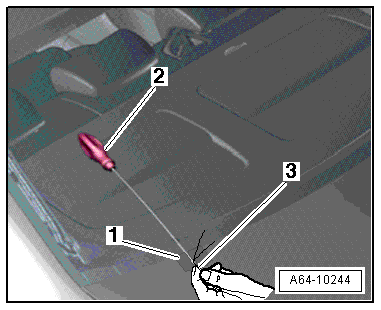
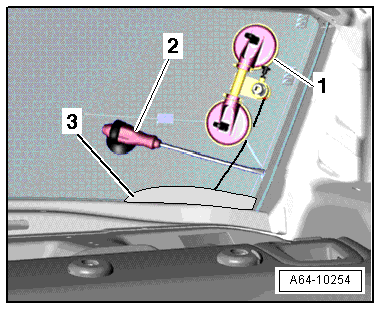
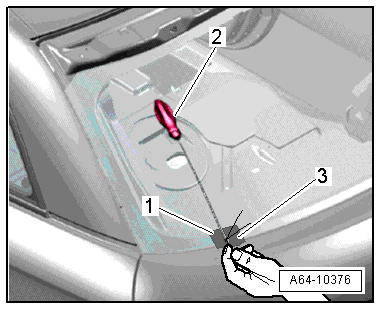
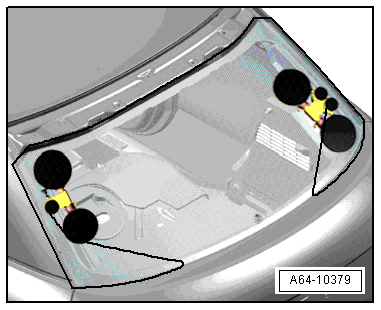
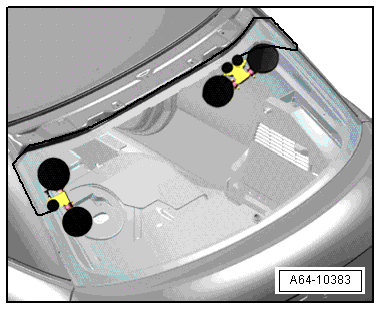
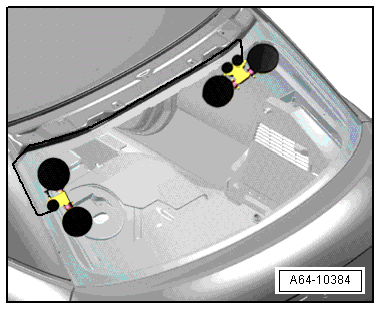
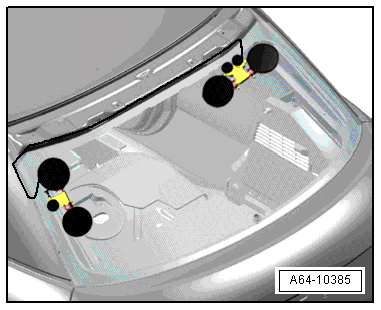
- Remove the nut -Item 7- → Item for the rear window ground connections.
- Remove the ground wire from the threaded pin and secure it to the center of the window with adhesive tape.
- Disconnect the connectors and secure to the window glass using adhesive tape.
 CAUTION
Risk of injury to the hands and eyes from glass fragments.
Getting cut is possible.
- Wear protective eyewear.
- Wear safety gloves.
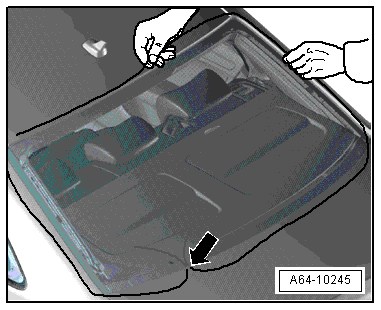
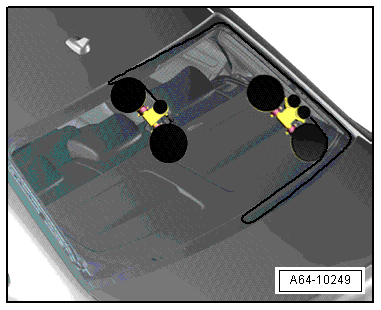
- Use the -VAS6452/1- to unroll approximately 6.5 meters (7.1 yards) of cutting wire (approximately six turns) and cut it.
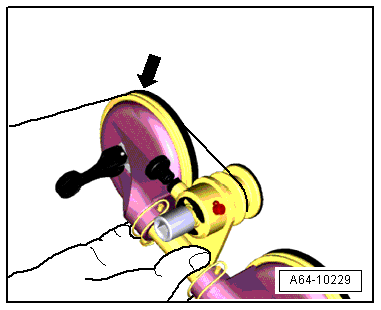
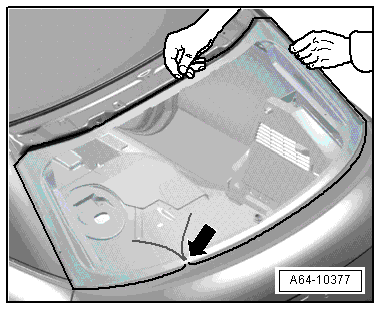
- To prevent any damage, cover the area where the awl comes out at the bottom of the body flange with adhesive tape -1-
- Thread both cutting wire ends -3- into the awl -2- and pull it toward the inside.
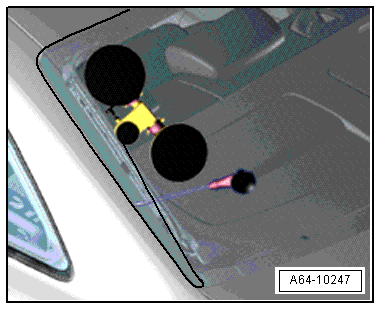
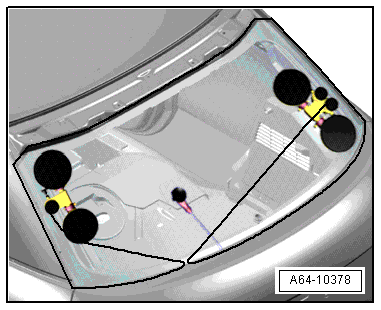
- Place the cutting wire all the way around under the rear window.
- The wire ends must not be twisted on the adhesive bead pass-through -arrow-.
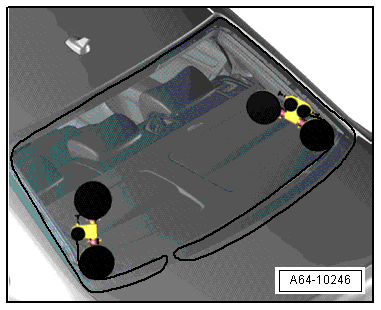
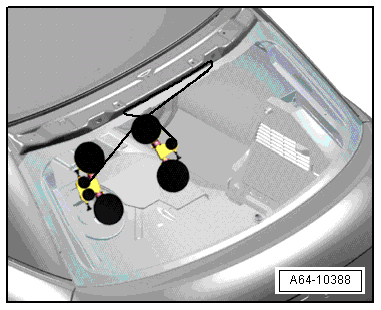
- Mount both reel devices on the inside of the glass.
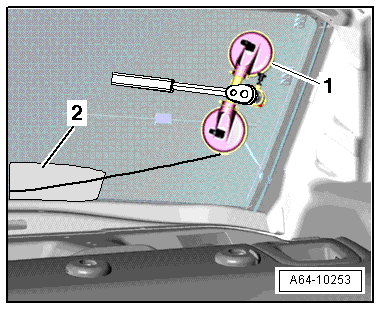
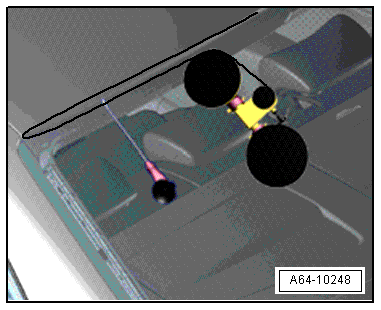
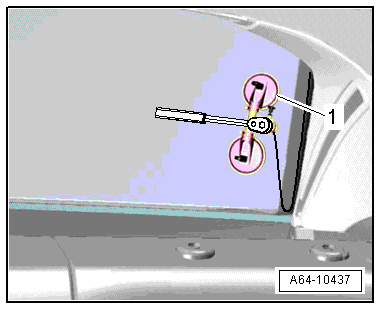
- Insert the cutting wire end -1- into the reel device -2-.

- Tension the cutting wire using the reel device -1- and insert the plastic film -2- from the -VAS6452- to protect between the wire and the rear shelf.
- Cut the first section free. This will guide the wire into the integrated idler roller -arrow- on the reel device.
- Insert an additional guide awl -2- into the adhesive bead and secure it to the window glass with the suction cup to make sure that the wire runs as close to the glass as possible.
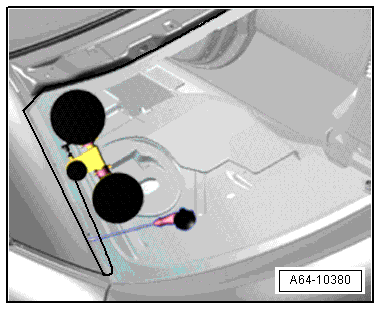
- If necessary, move the protective film -3- along with the wire and continue cutting the window glass free with the reel device -1-.
- Move the reel device and the guide awl and cut the area at the D-pillar free.
- Move the reel device and the guide awl.
- Continue cutting the window glass free until about the center of the window glass is reached.
- Use the second reel device to cut the lower section of the window glass free.
- Move the reel device upward and insert the guide awl.
- Cut the window glass out by moving upward along the D-pillar.
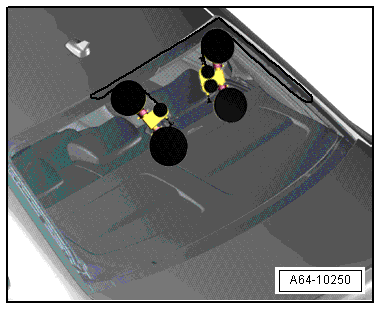
- Move the reel device over the center of the window glass and over the first reel device and cut the window glass completely free at the top edge.
- Remove the window glass with suction lifters.
Undamaged Rear Window, Removing, Avant
Special tools and workshop equipment required
- Cutting Tool for Bonded Windows - Wire Reel -VAS6452/1-
- Read the repair information. Refer to → Chapter "Repair Information"
- Required tools and materials for removal and installation. Refer to → Chapter "Required Tools and Materials for Removal and Installation".
- Remove the spoiler. Refer to → Chapter "Aerodynamic Trim, Removing and Installing".
- Remove the rear lid trim panel. Refer to → Body Interior; Rep. Gr.70; Luggage Compartment Trim Panels; Component Location Overview - Luggage Compartment Trim Panels.
- Remove the rear window wiper motor. Refer to → Electrical Equipment; Rep. Gr.92; Rear Window Wiper System; Rear Window Wiper MotorV12, Removing and Installing.
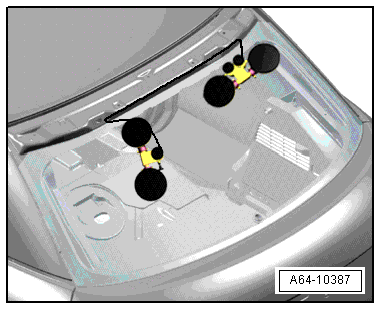
- Disconnect the connectors and secure to the window glass using adhesive tape.
CAUTION
Risk of injury to the hands and eyes from glass fragments.
Getting cut is possible.
- Wear protective eyewear.
- Wear safety gloves.
- Use the -VAS6452/1- to unroll approximately 6.5 meters (7.1 yards) of cutting wire (approximately six turns) and cut it.
- To prevent any damage, cover the area where the awl comes out at the bottom of the body flange with adhesive tape -1-.
- Pierce through the adhesive bead with an awl -2- from the inside to the outside.
- Thread both cutting wire ends -3- into the awl and pull it toward the inside.
- The wire ends must not be twisted on the adhesive bead pass-through -arrow-.
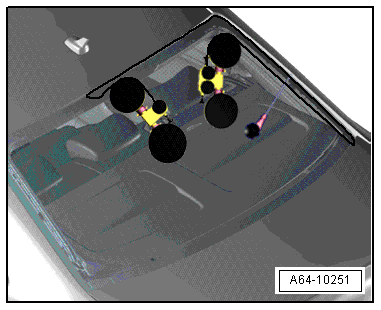
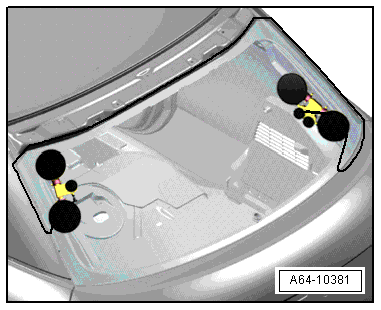
- Route the cutting wire around the rear window under the window glass as shown.
- Mount both reel devices on the inside of the glass.
- Insert an additional guide awl into the adhesive bead and secure it to the window glass with the suction cup to make sure that the wire runs as close to the glass as possible.
- Insert the cutting wire end -1- into the reel device -2-.
- Tension the cutting wire with the reel device -1-.
- Cut the first section at the lower window edge free.
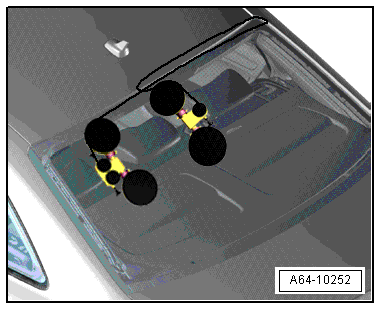
- Cut the window glass at the bottom of the D-pillar free.
- Position the guide awl and continue to cut upward in the area of the D-pillar.
- Move the reel device and the guide awl and cut the area at the bottom of the D-pillar on the opposite side free.
- Move the reel device upward and install the guide awl.
- Move upward to cut the window glass free.
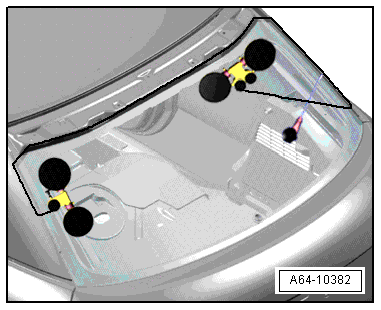
- Move the reel device.
- Cut the window glass free at the upper right window corner.
- Move the reel device to the upper left window edge and cut the window free.
- Move the left reel device up to the center of the window and mount the guide awl.

- Cut the window free along the top to approximately the center of the window.
- Move the right reel device over the left one and cut the window glass free completely.
- Lift the window out of the rear lid using the suction lifters.
Damaged Rear Window, Removing
Special tools and workshop equipment required
- Window Cutter -VAG1561A-
- Blade Offset -VAG1561/10-
- Follow repair instructions. Refer to → Chapter "Repair Information".
- Avant: remove the spoiler. Refer to → Chapter "Spoiler, Removing and Installing".
- Remove the rear lid trim panel. Refer to → Body Interior; Rep. Gr.70; Luggage Compartment Trim Panels; Component Location Overview - Luggage Compartment Trim Panels.
- Avant: Remove the rear window wiper motor. Refer to → Electrical Equipment; Rep. Gr.92; Rear Window Wiper System; Rear Window Wiper MotorV12, Removing and Installing.
- Disconnect the connectors and secure to the window glass using adhesive tape.
CAUTION
Risk of injury to the hands and eyes from glass fragments.
Getting cut is possible.
- Wear protective eyewear.
- Wear safety gloves.
- Protect the body and engine compartment from glass splinters.
- Remove the glass pieces up to the adhesive sealant.
- Tape off the flange all the way around with fabric-reinforced adhesive tape.
- Cut through the adhesive sealant (with glass remnants) in the opening for the window using a -VAG1561A- and -VAG1561/10- (with stopper roll).
Rear Window, Installing
- Follow repair instructions. Refer to → Chapter "Repair Information".
- Required tools and materials for removal and installation. Refer to → Chapter "Required Tools and Materials for Removal and Installation".
- Prepare the new window glass for installation. Refer to → Chapter "New Window Glass, Preparing for Installation".
- Prepare the undamaged window glass for installing. Refer to → Chapter "Undamaged Window Glass, Preparing for Installation".
- Prepare the body flange for installation. Refer to → Chapter "Body Flange, Preparing for Installation".
- Insert the rear window into the window opening using suction lifters.
- Center the window glass at the sides.
- Minimum curing times. Refer to → Chapter "Minimum Curing Times for Bonded Windows".
Further installation is performed in reverse order of removal, while noting the following:
TIP
After connecting the wires or antenna wires, there may be additional wires for other optional equipment. Cut off these unnecessary wire ends at their connection base.
READ NEXT:
 Side Windows
Overview - Rear Side Window
Overview - Rear Side Window, Sedan
1 -
Rear Side Window
Removing and installing. Refer to
→ Chapter "Rear Side Window, Removing and Installing".
After
Rear Side Window, Removing and Installing
Undamaged Side Window, Removing, Sedan
Special tools and workshop equipment
required
Wedge Set -T10383-
Wedge 1 -T10383/1-
Cutting Tool for Bonded Windows -VAS6452-
Bonded Window Tool Kit - Pull Han
Door Windows
Overview - Front Door Window
1 -
Window Regulator
Overview. Refer to
→ Chapter "Overview - Window Regulator".
2 -
Door Window
Removing and installing. Refer to
→&n
SEE MORE:
Sunroof Seals, Removing and Installing
Sunroof Seals, Removing and Installing, Sedan
Removing
- Remove the glass panel. Refer to
→ Chapter "Glass Panel, Removing and Installing, Sedan".
- Remove the seal -2- from the glass
panel -3-.
1 -
Roof
Installing
- Starting in the center, press the new seal on
Audi drive select
Introduction
Applies to: vehicles with Audi drive select
Drive select makes it possible to experience different
types of vehicle characteristics in one vehicle.
With different driving modes, the driver can
switch the setting, for example from sporty to
comfortable. This allows you to adjust the set
