Audi A4: Headrest, Removing and Installing
Removing
- Set the backrest toward the rear at an angle.
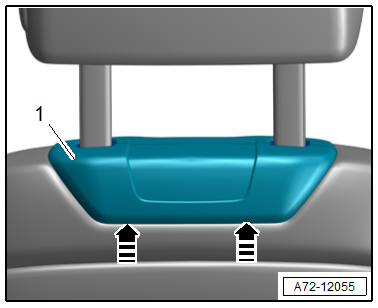
- Grip the rear cover -1- at the lower edge and push it upward out of the locking mechanism in the direction of -arrows-.
- Move the headrest all the way up.
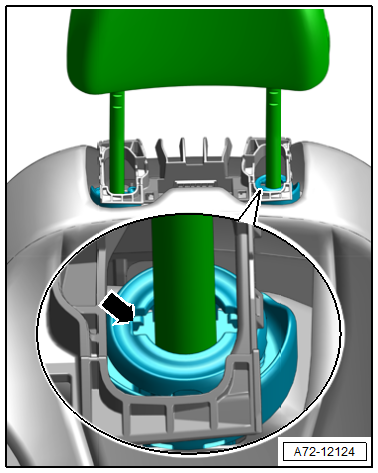
- Press down on the release ring -arrow- on the left headrest guide and remove the headrest upward at the same time.
Installing
Install in reverse order of removal.
Installation instructions: For example tightening specifications, replacing components. Refer to → Chapter "Overview - Headrest".
Headrest Guide, Removing and Installing
Removing
- Remove the backrest seat cover and cushion. Refer to → Chapter "Backrest Cover and Cushion, Removing and Installing".
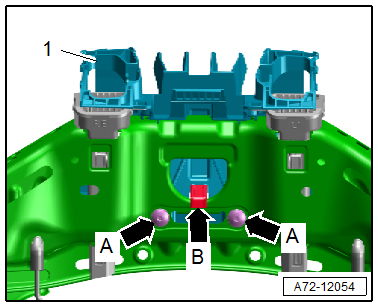
- Remove the bolts -A arrows-.
- Disengage the retainer -arrow B- and remove the cover -1-.
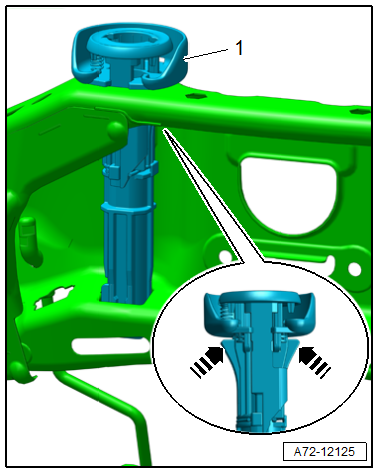
- Press the tabs down at the same time in the direction of -arrows-.
- Remove the headrest guide -1- upward.
Installing
Install in reverse order of removal.
Installation instructions: For example tightening specifications, replacing components. Refer to → Chapter "Overview - Headrest".
READ NEXT:
 Seat Pan, Disassembling and Assembling
Front and Rear Seat Rail Cover, Removing and Installing
Removing
- Move the front seat into its highest position.
Caution
Risk of damaging the seat rail cover.
Proceed very carefully whe
Driver/Front Passenger Seat Adjustment Control Head -E470-/-E471-,
Removing and Installing
Special tools and workshop equipment required
Trim Removal Wedge -3409-
Removing
- Carefully pry the actuators -1 and 2-
from the retainer using the -3409-.
- Remove the seat side trim o
Rear Seats
Overview - Bench Seat/Single Seat
1 - Grommets
For securing the rear bench seat
Clipped into the vehicle floor
Replace each time the bench seat is removed
2 - Bench Seat
Re
SEE MORE:
Overview - Sound System
The following systems are offered:
8RM - Basic sound system.
9VD - Standard sound system.
9VS - Premium sound system, Bang & Olufsen.
8RM - Basic Sound System
One speaker in the left and right front doors
One speaker on the left and right side of the instrument
panel
Two
Seat Pan Cover and Cushion, Removing and Installing
Special tools and workshop equipment required
Backrest Panel Tool -3370-
Hook Tool -T40207-
Engine/Transmission Holder - Seat Repair Fixture -VAS6136-
Caution
This procedure contains mandatory replaceable parts.
Refer to component overview and parts catalog prior to
starting procedur
