Audi A4: Rear Lid, Adjusting
Adjustment Dimensions
Adjustment Dimensions, Sedan
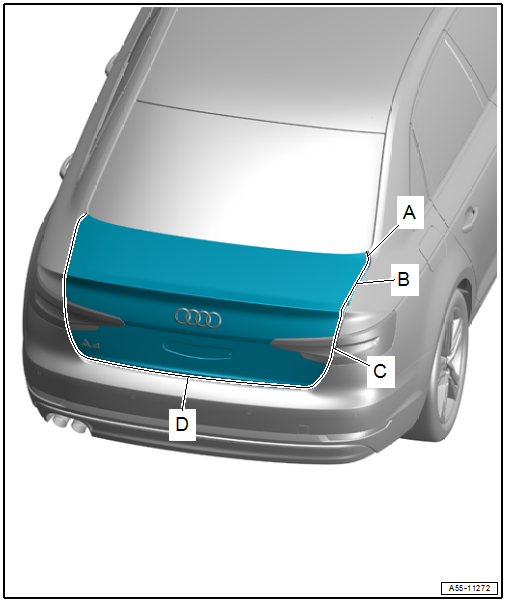
A - Rear Lid to Top of Side Panel
- Gap dimension = 3.5 mm
B - Rear Lid to Side Panel
- Gap dimension = 3.5 mm
C - Rear Lid to Side Panel
- Gap dimension = 3.5 mm
D - Rear Lid to Rear Lid End
- Gap dimension = 5.0 mm
Adjustment Dimensions, Avant
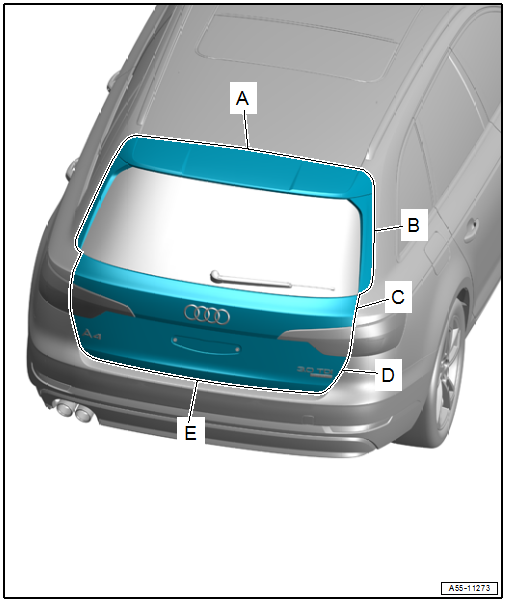
A - Rear Lid to Roof
- Gap dimension = 4.0 mm
B - Rear Lid to Top of Side Panel
- Gap dimension = 4.0 mm
C - Rear Lid to Side Panel Bottom
- Gap dimension = 3.5 mm
D - Rear Lid to Side Panel Bottom
- Gap dimension = 3.5 mm
E - Rear Lid to Rear Lid End
- Gap dimension = 5.0 mm
Side, Length and Height Adjustment at Hinge
Special tools and workshop equipment required
- Gauge - Gap Adjustment -3371-
Side Adjustment at Hinge, Sedan:
- Loosen the bolts -arrows-.
- Adjust the rear lid at the hinge -1- for the side adjustment.
- Tighten the bolts.
Tightening Specifications
- Refer to → Chapter "Overview - Rear Lid, Sedan"
Length Adjustment at Hinge, Sedan:
- Loosen the nuts -arrows-.
- Adjust the rear lid -1- lengthwise.
- Tighten the nuts.
Tightening Specifications
- Refer to → Chapter "Overview - Rear Lid, Sedan"
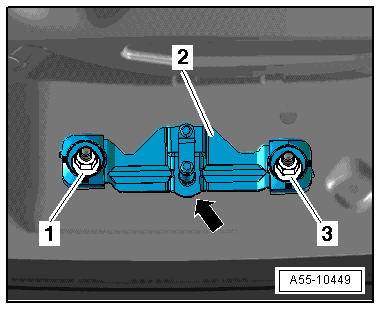
Height Adjustment at Hinge, Sedan:
- Loosen the nut -1-.
- Adjust the height of the rear lid at the hinge -2-.
- Use the markings on the mounting bracket -arrow- to adjust the height.
- Tighten the nut.
Tightening Specifications
- Refer to → Chapter "Overview - Rear Lid, Sedan"
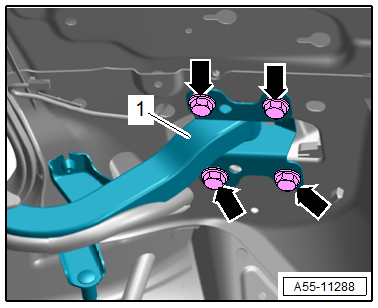
Length and Height Adjustment at Hinge, Avant
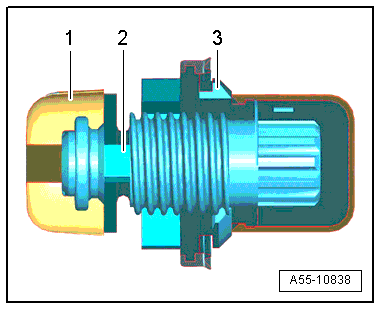
Height Adjustment at Hinge, Avant:
- Loosen the bolt -1- and the nut -3-.
- Adjust the height of the rear lid at the hinge -2-.
- Tighten the bolt and nut.
Tightening Specifications
- Refer to → Chapter "Overview - Rear Lid, Avant"
Length Adjustment at Hinge, Avant:
- Loosen bolts -1 and 2-.
- Adjust the rear lid -3- lengthwise.
- Tighten the bolts.
Tightening Specifications
- Refer to → Chapter "Overview - Rear Lid, Avant"
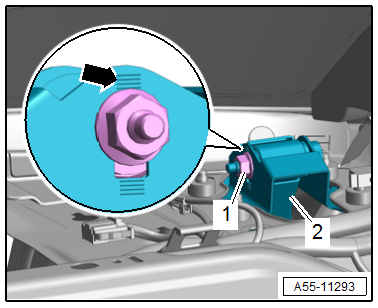
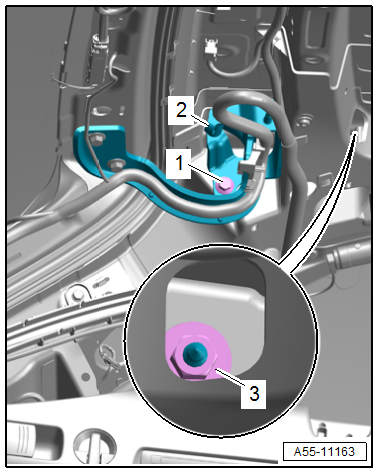
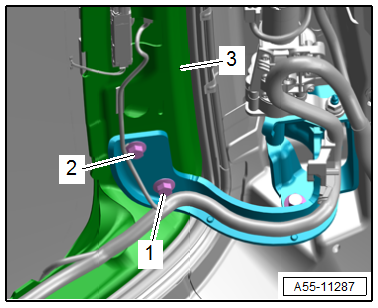
Height Adjustment at Striker
- Adjustment dimensions. Refer to → Chapter "Adjustment Dimensions".
Procedure
- Remove the lock carrier trim panel. Refer to → Body Interior; Rep. Gr.70; Luggage Compartment Trim Panels; Lock Carrier Trim Panel, Removing and Installing.
- Before adjusting, install the lid-side adjusting buffer entirely. Refer to → Chapter "Height, Adjusting using Adjusting Buffer".
- Loosen the nuts -1 and 3-. The striker -2- must be movable.
- Close the lid and check the closing position.
- If necessary, adjust the closing position using the upper adjusting buffer.
- The rear lid latch must be engaged in the main detent (second catch) at the same time.
- Open the lid and tighten the nuts.
- Adjust the adjusting buffer. Refer to → Chapter "Height, Adjusting using Adjusting Buffer".
Tightening Specifications
- Refer to → Chapter "Overview - Rear Lid"
Height, Adjusting using Adjusting Buffer
- Adjustment dimensions. Refer to → Chapter "Adjustment Dimensions".
Procedure
- Install the adjusting screw -2- with the protective cap -1- all the way into the adjusting buffer -3- before adjusting the lid.
- Remove the adjusting screw -2- just enough until the protective cap -1- makes contact with the stop/buffer with light pretension when the rear lid is closed.
- Check if the lid is without play and in flush position by pressing or pulling at the side edges of the rear lid.
- Repeat the adjustment if necessary.
READ NEXT:
 Hinges, Removing and Installing
Hinges, Removing and Installing, Sedan
Removing
- Remove the rear lid. Refer to
→ Chapter "Rear Lid, Removing and Installing, Sedan".
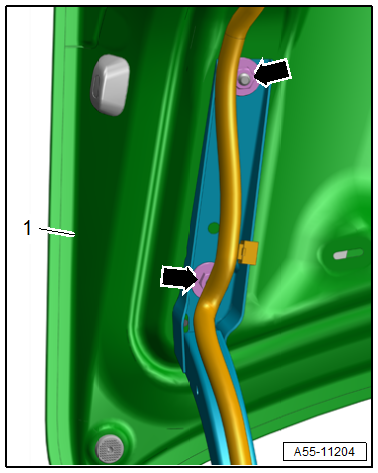
- Remove the luggage compartment side trim panel
Adjusting Buffer, Removing and Installing
Adjusting Buffer, Removing and Installing, Sedan
Body Adjusting Buffer
Removing
- Turn the adjusting buffer -1-
counter-clockwise -arrow- to
remove.
- Remove the adjusting buffer locking m
Gas-Filled Strut, Removing and Installing
Removing
- Support the lid or secure it against falling.
- Sedan: remove the right luggage compartment side trim panel.
Refer to
→ Body Interior; Rep. Gr.70; Luggage Compa
SEE MORE:
Lock Carrier
Overview - Lock Carrier
1 - Impact Member
2 - Air Duct
Clipped into the bumper cover bracket
3 - Bolt
8 Nm
4 - Lower Air Guide
For the radiator
5 - Bumper Cover Bracket
Removing and installing. Refer to
→ Chapter "Bumper Cover Bracket,
Antenna Wires, Repairing
Aerial Cable Repair Set VAS6720
Special tools and workshop equipment required
Aerial Cable Repair Set -VAS6720-
The Aerial Cable Repair Set -VAS6720- makes it possible to
perform a quality repair on antenna wires RG 174 (blue) and RTK
031 (black). The set contains the insulation removal tools a
