Audi A4: Rear Lid Lower Trim Panel, Removing and Installing
Lower Rear Lid Trim Panel, Removing and Installing, Sedan
Special tools and workshop equipment required
- Pry Lever -80-200-
- Trim Removal Wedge -3409-
- Removal Wedge -T40233-
- Omega Clip Tool -T40280-
Removing
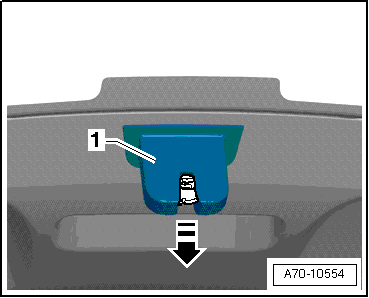
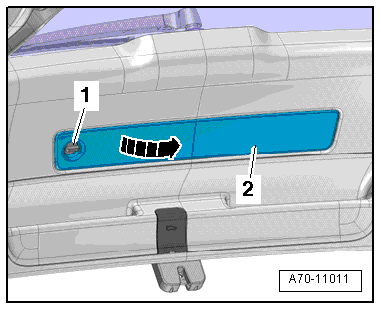
- Remove the rear lid latch trim panel -1- using the -T40233- in the direction of -arrow-.
- Remove the warning triangle from the bracket by pressing the release.
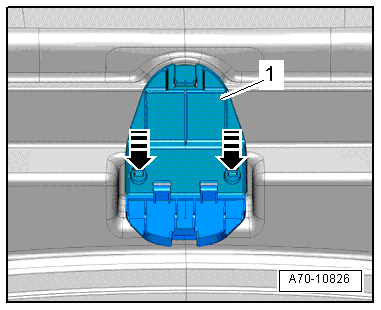
- Release the retaining tabs using a screwdriver in the direction of -arrows- and remove the warning triangle bracket -1-.
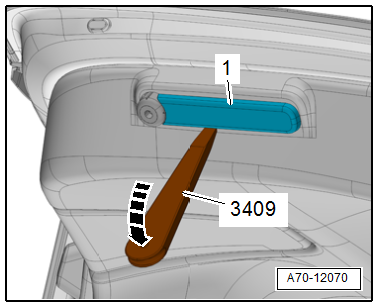
- Unclip the stop strip -1- using the -3409- in the direction of -arrow-.
- Repeat the procedure on the opposite side.
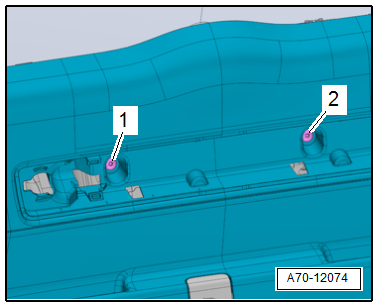
- To remove the expanding clips -1- push the clamping pin -2- in carefully approximately 5 mm until it engages audibly in the expanding clip in the direction of -arrow- (do not push in completely, otherwise the clamping pin can fall).
- Remove the released expanding clips with a clamping pin.
- Pull the rear lid hinge trim panel -3- downward out of the rear lid trim panel and remove it.
- Repeat the procedure on the opposite side.
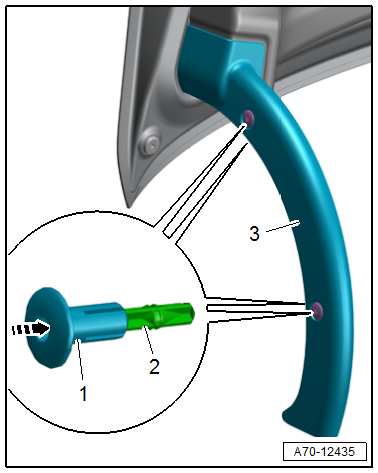
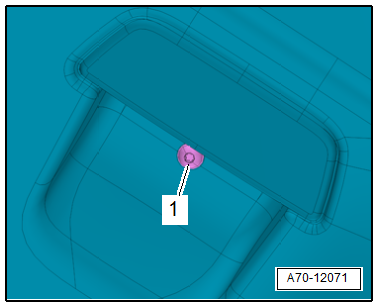
- Remove the bolt -1-.
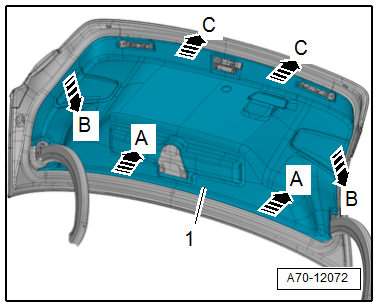
- Unclip the rear lid trim panel -1- starting at the top of the rear lid in the direction of -arrows A- using the -80-200-.
- Unclip the side rear lid trim from the rear lid in the direction of -arrows B-.
- Unclip the rear lid trim from the rear lid in the direction of -arrows C- and remove.
Installing
Install in reverse order of removal.
Installation instructions: For example tightening specifications, replacing components. Refer to → Chapter "Overview - Lower Rear Lid Trim Panel, Sedan".
Lower Rear Lid Trim Panel, Removing and Installing, Avant
Special tools and workshop equipment required
- Removal Wedge -T40233-
- Omega Clip Tool -T40280-
Removing
- Remove the rear lid closing button. Refer to → Electrical Equipment; Rep. Gr.96; Controls; Rear Lid Lock Button in Luggage CompartmentE406, Removing and Installing.
- Remove the rear lid lamp. Refer to → Electrical Equipment; Rep. Gr.96; Lamps; Component Location Overview - Luggage Compartment Lamps.
- Turn the quick release -1- 90º counter-clockwise and move the emergency triangle cover -2- to the side -arrow-.
- Remove the emergency triangle.
- Disengage the cover on the lower trim and remove it.
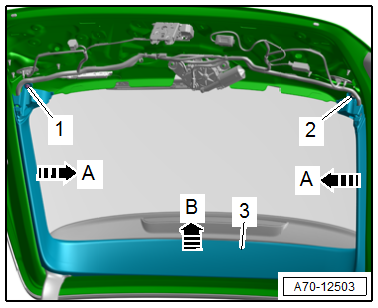
- Remove the bolts -1 and 2-.
- Starting from the outside, unclip the trim panel -1- from the rear lid in the direction of -arrows- using the -T40233-.
- Unclip the rest of the trim panel clips and trim panel and remove it.
- If equipped, release the retaining tabs -arrows A- with a screwdriver, and remove the rear lid trim -1- in the direction of -arrow B-.
Installing
Install in reverse order of removal.
Installation instructions: For example tightening specifications, replacing components. Refer to → Chapter "Overview - Rear Lid Trim Panel, Avant".
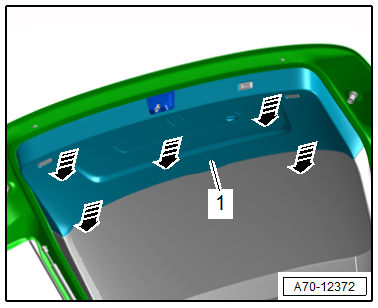
Rear Lid Upper Trim Panel, Removing and Installing
Special tools and workshop equipment required
- Removal Wedge -T40233-
- Omega Clip Tool -T40280-
Removing
- Remove the rear lid lower trim panel. Refer to → Chapter "Lower Rear Lid Trim Panel, Removing and Installing, Avant".
- Remove the bolts -1 and 2-.
- Unclip the trim panel -3- from the sides of the rear lid in the direction of -arrows A- using the -T40233-.
- Unclip the rest of the trim panel clips in the direction of -arrow B- and remove it.
Installing
Install in reverse order of removal.
Installation instructions: For example tightening specifications, replacing components. Refer to → Chapter "Overview - Rear Lid Trim Panel, Avant".
READ NEXT:
 Luggage Compartment Side Trim Panel, Removing and Installing
Luggage Compartment Side Trim Panel, Removing and Installing, Sedan
Special tools and workshop equipment required
Trim Removal Wedge -3409-
Pliers -T40172C-
Omega Clip Tool -T40280-
Removing
-&nb
Lock Carrier Trim Panel, Removing and Installing
Special tools and workshop equipment required
Omega Clip Tool -T40280-
Removing
- Remove the rear luggage compartment floor.
- Free up the lock carrier trim panel near the rear lid seal
-
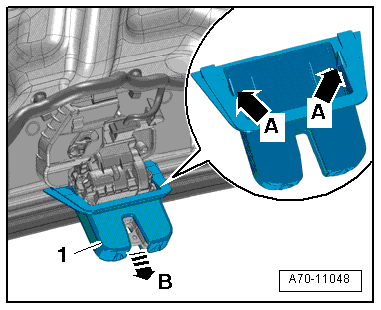
Bag Hook, Removing and Installing
Removing, Sedan
- Remove the bolts -arrows-, and
remove the hook -1-.
Removing, Avant
- Push the bag hook -1- into the bag
hook mount in the direction of -arrow A-.
- At the same tim
SEE MORE:
Center Console Rear Trim, Removing and Installing
Special tools and workshop equipment required
Wedge Set -T10383-
Wedge Set - Wedge 1 -T10383/1-
Removing
- Move the front seats all the way forward.
- Using either the -T10383/1- or by hand, unclip the trim
-1- from the center console in the
direction of -arrows-.
- Remove the tr
General Information - Multifunction Steering Wheel
The button is integrated in the steering wheel for easier
operation of infotainment, telephone and the navigation system.
On Tiptronic, rocker switches are also installed on the left and
right.
The Multifunction Steering Wheel Control Module -J453- (in
the right button) reads out the information
