Audi A4: Fuel Filler Door Unit
Overview - Fuel Filler Door Unit
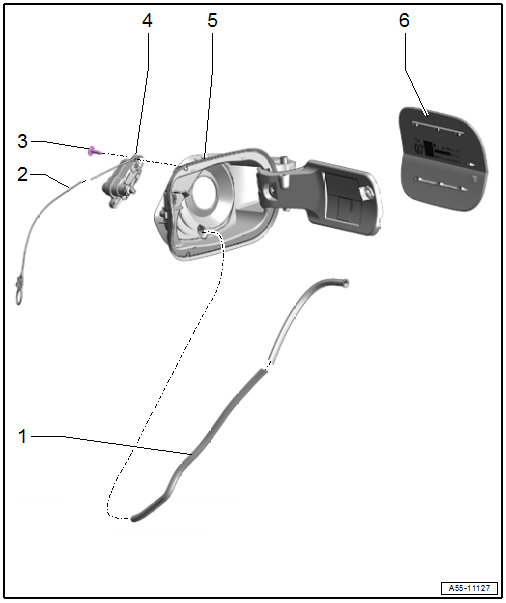
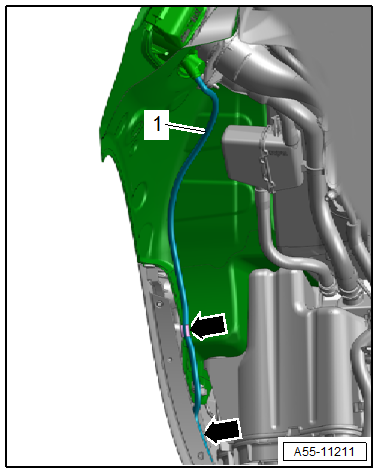
1 - Drain Hose
- From the fuel filler door unit
- Removing and installing. Refer to → Chapter "Fuel Filler Door Unit Drain Hose, Removing and Installing".
2 - Emergency Release Cable
- Removing and installing. Refer to → Chapter "Emergency Release Cable, Removing and Installing".
3 - Bolt
- 1.5 Nm
- Quantity: 2
4 - Fuel Filler Door Lock Motor -V155-
- Removing and installing. Refer to → Chapter "Fuel Filler Door Lock Motor -V155-, Removing and Installing".
5 - Fuel Filler Door Unit
- Replace after removing
- Removing and installing. Refer to → Chapter "Fuel Filler Door Unit, Removing and Installing".
6 - Fuel Filler Door Trim
- Removing and installing. Refer to → Chapter "Fuel Filler Door Trim, Removing and Installing".
Fuel Filler Door Unit, Removing and Installing
- The following components must be replaced after removal. Refer to → Chapter "Overview - Fuel Filler Door Unit".
Removing
- Open the cover for the luggage compartment side trim panel and free up the emergency release cable.
- Detach the rear section of the right wheel housing liner and push it aside. Refer to → Chapter "Rear Wheel Housing Liner, Removing and Installing".
- Free up the drain hose -1--arrows-.
- Remove the fuel filler door trim. Refer to → Chapter "Fuel Filler Door Trim, Removing and Installing".
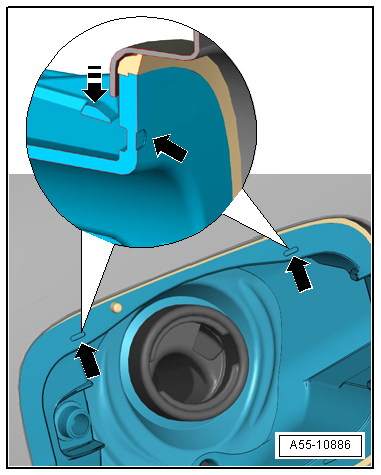
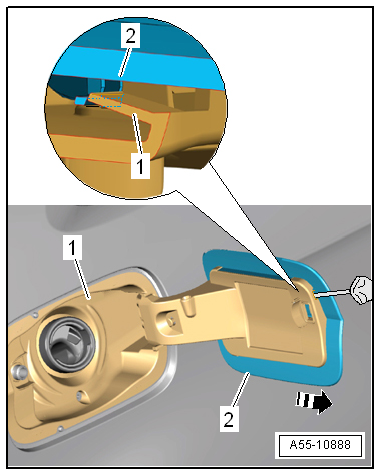
- Release the fuel filler door unit by using a small screwdriver to pierce the markings -arrows-.
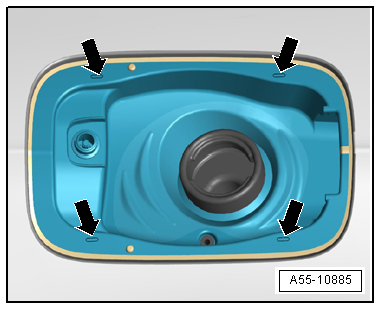
- At the top of the fuel filler door unit, pierce a small screwdriver through the fuel filler door markings over the retainers at an angle from below in the direction of -arrow-.
- Gently lift the screwdriver upward and release the retainers.
- On the underside, pierce the screwdriver at the markings at an angle from above to below.
- Gently push the screwdriver downward and release the retainers.
- Remove the fuel filler door unit with the drain hose gradually from the opening.
- Disconnect the connector.
- Remove the fuel filler door unit while guiding out the emergency release cable.
Installing
Install in reverse order of removal and note the following:
- Insert the hinge side of the fuel filler door unit first into the fuel filler door opening and push it in until it clicks into place.
Fuel Filler Door Trim, Removing and Installing
Removing
- Open the fuel filler door.
- Using a screwdriver, release the clips in the opening between the trim -2- and the fuel filler door unit -1-.
- Pull the trim just a little from the fuel filler door unit toward the rear -arrow- and remove it.
Installing
Install in reverse order of removal and note the following:
- The guides on the trim -2- must be positioned behind the mounts -arrows- when placing on the fuel filler door unit -1-.
- Slide the trim forward until the clips audibly engage.

Fuel Filler Door Unit Drain Hose, Removing and Installing
Removing
- Detach the rear section of the right wheel housing liner and push it aside. Refer to → Chapter "Rear Wheel Housing Liner, Removing and Installing".
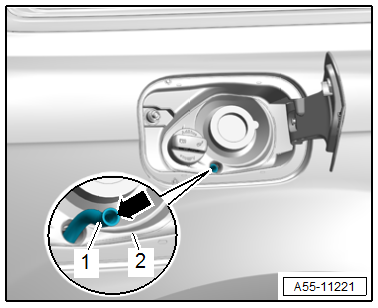
- Free up the drain hose -1--arrows-.
- Remove the drain hose upward from the fuel filler door unit.
Installing
Install in reverse order of removal and note the following:
- Insert the drain hose -1- from above into the fuel filler door cup -2-.
- The collar -arrow- on the drain hose must be on top.
- Insert the drain hose into the mount.
Emergency Release Cable, Removing and Installing
Removing
- Remove the fuel filler door unit. Refer to → Chapter "Fuel Filler Door Unit, Removing and Installing".
- Remove the fuel filler door unlock motor. Refer to → Chapter "Fuel Filler Door Lock Motor -V155-, Removing and Installing".
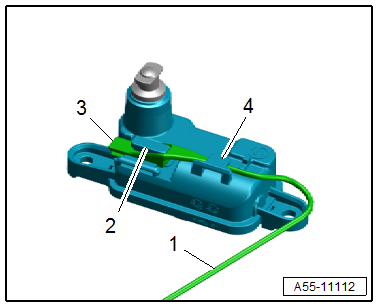
- Thread the release cable -1- out of the guide -4-.
- Disengage the tab -3- on the emergency release mount -2- and remove it from the support bracket.
Installing
Install in reverse order of removal.
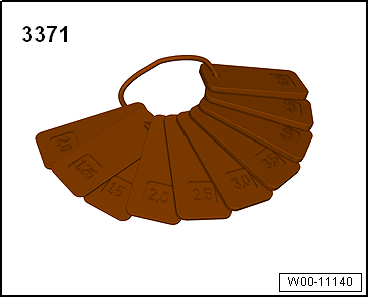
Special Tools
Special tools and workshop equipment required
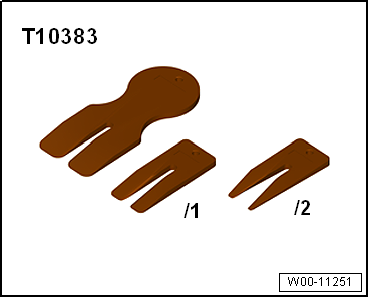
- Wedge Set -T10383-
- Wiring Harness Repair Set - Hot Air Blower -VAS1978/14A-
- Gauge - Gap Adjustment -3371-
READ NEXT:
 Door
Door
Overview - Door
1 -
Door
Removing and installing. Refer to
→ Chapter "Door, Removing and Installing".
2 -
Bolt
8 Nm
Quantity: 2
3 -
Bolt
33 Nm
4 -&
Door, Removing and Installing
Caution
This procedure contains mandatory replaceable parts.
Refer to component overview and parts catalog prior to
starting procedure.
Mandatory Replacement Parts
Outer Door Seal - from D
SEE MORE:
General Information
Vehicles with a High Voltage System (Hybrid Vehicles)
Extremely Dangerous Due to High-Voltage
The high-voltage system is under high-voltage. Death or serious
bodily injury by electric shock.
- Individuals with electronic/medical life- and health sustaining
machines in or on their person canno
