Audi A4: General Information
 Caution
There is a risk of damaging the threads in the vehicle body.
- The bolts and nuts at all suspension parts must not be loosened or tightened with an impact wrench.
- Always install the bolts and nuts by hand for the first few turns.
- When installing waxed components, contact surfaces must be cleaned. Contact surfaces must be free of wax and grease.
- Welding or adjustment procedures are not permitted on load-bearing or wheel-controlling components.
- Always avoid exposing the coil springs to the following: Hammer strokes, welding beads, applying subsequent color codes.
- Do not perform any welding or grinding (separating work) near the coil springs or suspension struts. Cover coil springs or suspension struts if necessary.
- When loosening or removing and installing hydraulic, pneumatic lines or wires, draw sketches or take pictures. This ensures installation is the same as the original.
- If the cable ties, brackets or mounting elements were removed during the repair procedure, they must be installed at their original location that corresponds to the series production.
- Apply a thin coat of assembly paste to the splines on the outer joint before installing the outer joint in the wheel hub. Refer to the Parts Catalog.
- Never allow the drive axle to hang loose under the vehicle or to bend them at the joints during repair procedures.
- Vehicles without a drive axle must not be moved, otherwise the wheel bearing will be damaged. If a vehicle must be moved, be sure to note the following:
- Install an outer joint in place of the drive axle.
- Tighten the outer joint to 200 Nm.
- Bonded rubber bushings have a limited range of rotation. Only tighten the threaded connections for the suspension when the vehicle is in curb weight position.
- Lift the wheel bearing in curb weight position. Refer to → Chapter "Wheel Bearing in Curb Weight Position, Lifting Vehicles with Coil Spring".
- Always replace bonded rubber bushings on both sides of vehicle.
- If the vehicle must still have an axle alignment, only tighten the bolts and nuts that were loosened when making adjustments to the tightening specification. Tighten the bolts and nuts to the specified additional tightening angle after the alignment/adjustment is complete.
 WARNING
Risk of accident!
If the vehicle will be driving on the streets, all bolts and nuts must be tightened properly according to the guidelines.
General Repair Information
General and significant notes for individual repair procedures are listed here. These would otherwise be listed many times at various points throughout the repair manual. They apply to this repair manual.
Contact Corrosion
Contact corrosion can occur if incorrect fasteners (bolts, nuts, washers, etc.) are used.
For this reason, only fasteners with a special surface coating are installed.
In addition, rubber or plastic parts and adhesives are made of non-conductive materials.
If there are doubts whether a part should be used again, install a new part according to the Parts Catalog.
 Note
Note
- The use of original replacement parts is recommended, since they are tested and are compatible with aluminum.
- The use of Audi accessories is recommended.
- Contact corrosion damage is not covered under warranty!
Seals and Gaskets
- Always replace seals and gaskets.
- After removing seals, inspect the contact surfaces on housings and shafts for burrs and damage and repair if necessary.
- Remove any liquid sealant residue completely from sealing surfaces.
Bolts and Nuts
- Loosen and tighten the bolts and nuts from the covers and housings diagonally.
- Do not tilt, but rather loosen and tighten especially sensitive parts diagonally and in stages, for example servo motor with control module.
- Tightening specifications for non-lubricated bolts and nuts are given.
- Always replace self-locking nuts and bolts.
- Always replace the bolts and nuts, which are tightened with an additional turn.
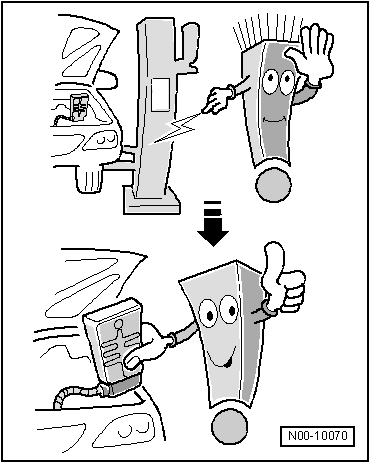
Electrical Components
It is safe to assume that everyone has been shocked at one time or another when coming into contact with a metal object. The reason for this is the build-up of static electricity in the human body. This charge can cause malfunctions when contacting the electrical components for the steering gear.
- Touch a grounded object, such as, a water pipe or a vehicle hoist, before working on electrical components. Do not make direct contact with the connector terminals.
Damaged Threads in Longitudinal Member, Repairing (Subframe to Body)
Procedure for repairing a damaged thread.
READ NEXT:
 Wheel Bearing in Curb Weight Position, Lifting Vehicles with Coil Spring
Special tools and workshop equipment required
Engine and Gearbox Jack -VAS6931-
Tensioning Strap -T10038-
Engine/Gearbox Jack Adapter - Wheel Hub Support -T10149-
Note
All bolts on chassi
Disposal
Front Gas-Filled Shock Absorbers, Venting and Draining
Special tools and workshop equipment required
Hand drill
3 mm diameter drill bit.
6 mm diameter drill bit
Oil collecting container
Protecti
SEE MORE:
Rear Window
Overview - Rear Window
Overview - Rear Window, Sedan
1 -
Rear Window
Removing and installing. Refer to
→ Chapter "Rear Window, Removing and Installing".
Distance to roof: dimension -a- = 2 mm
Distance to C-pillars: dimension -d- =
approximately 3 mm; center if necessary
2
Refrigerant Circuit
Refrigerant Circuit with Expansion Valve and Evaporator
The following illustration shows only the principle of a
refrigerant circuit, the design of the refrigerant circuit in
the respective vehicle can be found in the vehicle-specific
repair manual. Refer to
→ Heating, Ventilation and Air
