Audi A4: Hinge, Resetting
- To complete the procedure, a second technician is required to be at the following position.
 NOTICE
Risk of damaging the hood by opening when the pedestrian protection is triggered.
- Only open the hood after the triggered pedestrian protection has been reset.
- Use tape to protect the edges of the hood and the fender at their transition from damage.
- With the help of two people, push the hood hinges -Item 9- → Item at the same time back into the original position on the left and right sides until it engages.
Striker, Removing and Installing
Removing
- Mark the striker for reinstallation.
- Remove the nuts -arrows-.
- Remove the striker -1-.
Installing
Install in reverse order of removal and note the following:
- Install the striker according the marking made during removal.
- Adjust the striker. Refer to → Chapter "Side and Height Adjustment at Striker".
Tightening Specifications
- Refer to → Chapter "Overview - Front Lid"
Gas-Filled Strut, Removing and Installing
Removing
- Support the lid or secure it against falling.
- Using a small screwdriver, lift the locking spring -1- slightly -arrow- and remove the gas-filled strut -2- from the ball pin.
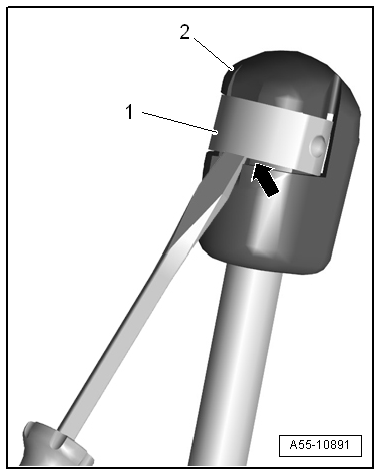
Installing
Install in reverse order of removal and note the following:
- Press the gas-filled strut onto the ball stud until it engages audibly.
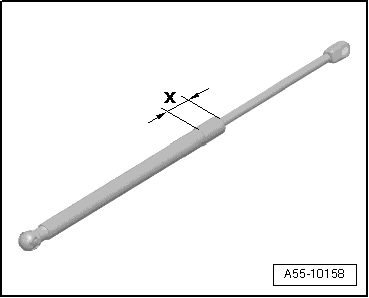
Gas-Filled Strut, Venting
- Clamp the gas-filled strut in a vise in the area -x- = 50 mm.
 CAUTION
Risk of eye injury due to flying shavings.
Eye irritation and injury is possible.
- Wear protective eyewear.
- Saw the gas-filled strut cylinder within the first third of the overall cylinder length, starting from the edge on the piston rod side. While doing so, cover the cut area with a cleaning cloth to absorb oil spraying out.
Insulation, Removing and Installing
Removing
- Release the clips -1- and remove the insulation -2-.
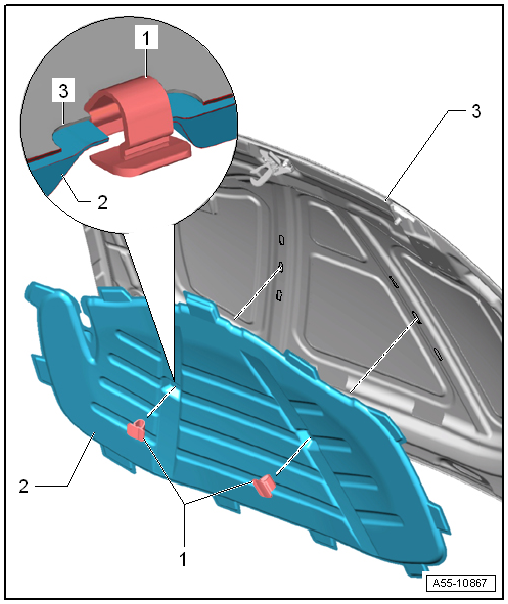
Installing
Install in reverse order of removal and note the following:
- First slide the insulation over the tabs on the rear edge and into the designated cut-outs on the inner panel -3-.
- Insert the tabs at the front edge and sides.
- The clips must engage audibly when pressing in.
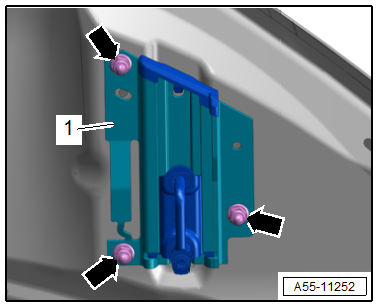
Impact Guard, Removing and Installing
Impact Guard, Removing and Installing, Center
Removing
- Pry out the center impact guard -2-. The retainers -1- are released at the same time.
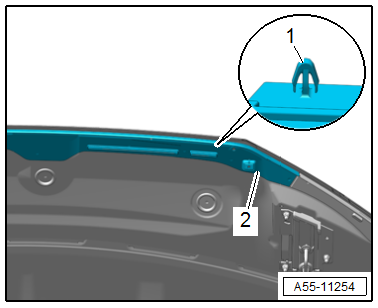
Installing
Install in reverse order of removal and note the following:
- Press on the catches until they engage audibly.
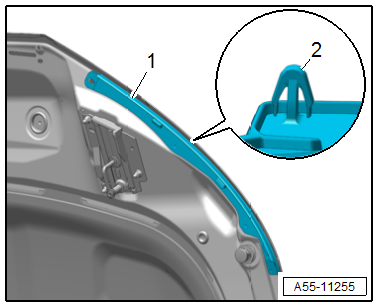
Impact Guard, Removing and Installing, Side
Removing
- Remove the center impact guard. Refer to → Chapter "Impact Guard, Removing and Installing, Center".
- Pry out the side impact guard -1-. The retainers -2- are released at the same time.
Installing
Install in reverse order of removal and note the following:
- Press on the catches until they engage audibly.
READ NEXT:
 Release Cable, Removing and Installing
Latch Release Cable, Removing and Installing
Removing
- Remove the vehicle electrical system control module bracket.
Refer to
→ Electrical Equipment; Rep. Gr.97; Relay Panels,
Rear Lid
Overview - Rear Lid, Sedan
Overview - Rear Lid
1 -
Tension Spring
Quantity: 2
Removing and installing. Refer to
→ Chapter "Tension Spring, Removing and Installing".
2 -
Rear Lid, Removing and Installing
Rear Lid, Removing and Installing, Sedan
To complete the procedure, a second technician is required to be at
the following position.
Removing
- Remove the rear lid lower trim panel. Refer to
SEE MORE:
Overview - Gear Set
Overview - Gear Set, FWD Vehicles
1 - Oil Pipe
2 - Bolt
3 Nm + 90º
Replacing
M6 × 30
3 - Gear Positioner with:
Transmission Input Speed Sensor 1 -G632-
Transmission Input Speed Sensor 2 -G612-
Gear Position Distance Sensor 1 -G487-
Gear Position Distance Se
Mechatronic, Removing and Installing
Special tools and workshop equipment required
Used Oil Collection and Extraction Unit -SMN372500-
Assembly Tool -T40305-
Oil Sump Assembly Pin -T40199-
Electronic Torque Wrench 3-60Nm -VAS6583-
Cover -T40322-
Support -T40321-
Removing
Note
General repair instructions. Refer to
→
