Audi A4: Outer CV Joint, Checking
It is necessary to disassemble the joint whenever replacing the grease or if the ball surfaces show wear or damage.
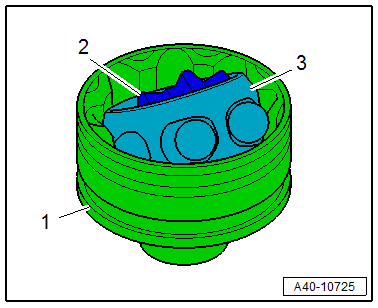
Disassembling
- Mark the position of the ball hub -2- to ball cage -3- and to housing -1- before disassembling, using an electric engraver or grindstone.
- Tilt the ball hub and ball cage.
- Remove the balls one after the other.
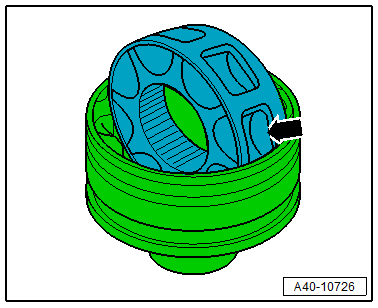
- Turn the cage, until two rectangular windows -arrow- rest on the joint housing.
- Lift out cage with hub.
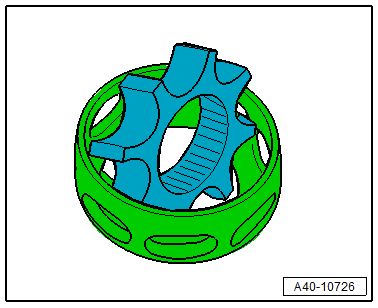
- Tilt the hub segment with shorter pins into rectangular window on the cage.
- Fold hub out from cage.
Checking
The balls for each joint belong to one tolerance group. Check the axle stub, hub, cage and balls for small depressions (pitting build-up) and chafing. Excessive backlash in the joint is noticeable by a thump during load alternations. The joint should be replaced in these cases. Flattening and running marks on the balls are no reason to replace a joint.
Assembling
- Insert cage with hub into joint body.
 Note
Note
Cage must be inserted on the correct side.
- Press in the opposite facing balls one after the other, and the old ball hub position to the ball cage and to the joint housing must be replicated.
- Press the grease into the joint body.
READ NEXT:
 Clamp on Triple Roller Joint and Outer Joint, Tensioning
Note
Depending on the version of the clamp, use the following
tools:
Special tools and workshop equipment required
Torque Wrench 1331 5-50Nm -VAG1331-
Clamping Pliers -VAG1682A-
Locking P
Special Tools
Special tools and workshop equipment required
Shock Absorber Set -T10001-
Tensioning Strap -T10038-
Tripod Joint Tool -T10065-
Engine/Gearbox Jack Adapter - Wheel Hub Support -T10149-
SEE MORE:
Generator
Generator, Checking
Perform Generator Test
Vehicle Diagnostic Tester is attached.
- Select the Diagnostic mode and
start the diagnostics.
- Select the tab Test Plan.
- Select Select Individual Tests
and choose the following sequence.
Body
Electrical Equipment
27 - Starter, volta
Garage door opener
Description
Applies to: vehicles with garage door opener
With the garage door opener, you can activate
systems such as the garage doors, security systems
or house lights from inside your vehicle.
These functions are operated in the MMI. Multiple
receivers can be programmed, which can control
the
