Audi A4: Trim Molding, Removing and Installing
Trim Molding, Removing and Installing, Front Door
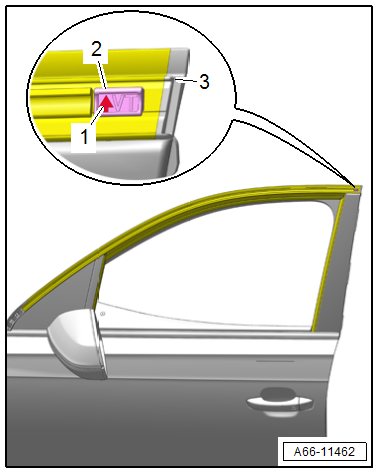
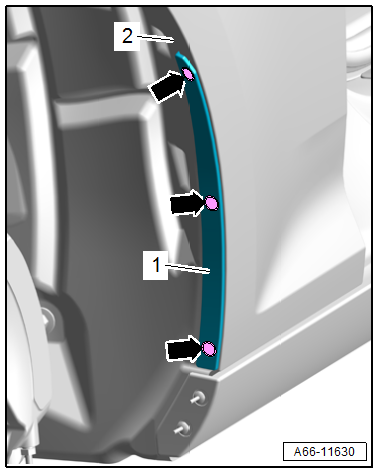
Removing
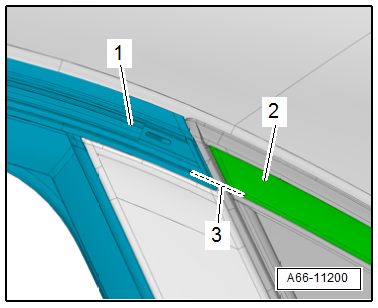
- Using a small screwdriver -2-, pry the trim molding -1- out of the clip at the opening in the direction of -arrow-.
- Carefully pry the entire length of the trim molding out of the window guide -3- and remove it.

Installing
Install in reverse order of removal and note the following:
- Push a new clip -2- into the window guide mount -3-.
- The arrow -1- must point upward.
- "VT" = Front door
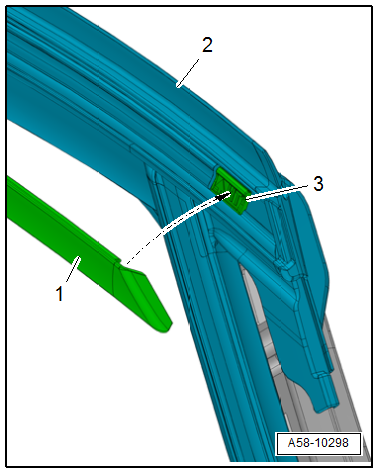
- Align the trim molding -1- on the B-pillar door flange, and insert it from below into the clip -3- and window guide -2-.
- Push on the entire length of the trim molding.
TIP
For an easier installation, spray the seal with soapy water, for example.
Trim Molding, Removing and Installing, Rear Door
Removing
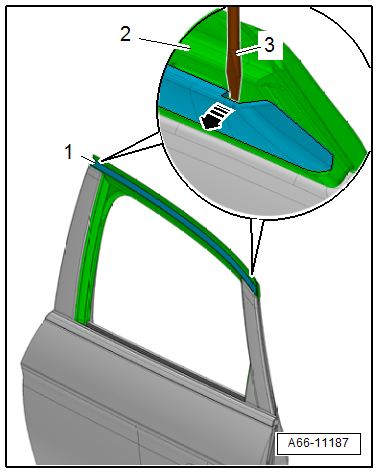
- Using a small screwdriver -3-, pry the trim molding -1- out of the clip at the opening -arrow-.
- Carefully pry the entire length of the trim molding out of the window guide -2- and remove it.
Installing
Install in reverse order of removal and note the following:
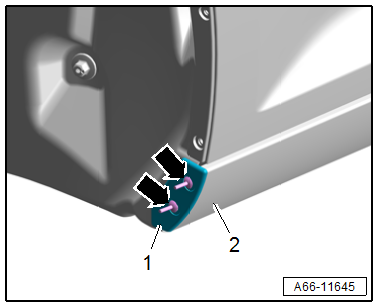
- With the trim molding still removed, the parallel alignment of the trim molding mount in the window guide to the front door and to the side window must be checked.
- The trim molding mount -2- must be parallel -3- with the front door trim molding -1-.
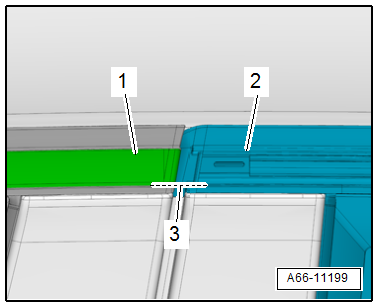
- The trim molding mount -1- must be parallel -3- with the side window trim molding -2-.
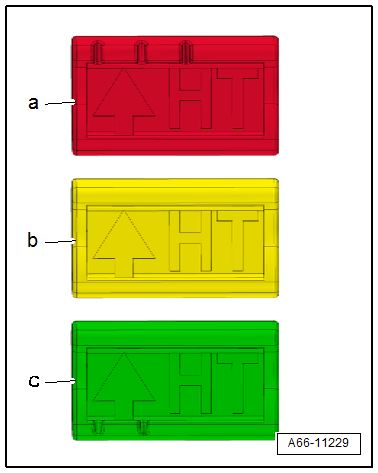
- There are colored clips for correct adjustment and checking.
- -a- = + 1.0 mm
- -b- = Normal position
- -c- = -1.0 mm
- Push a new clip -1- into the window guide mounting -3-.
- The arrow -2- must point upward.
- "HT" = Rear door
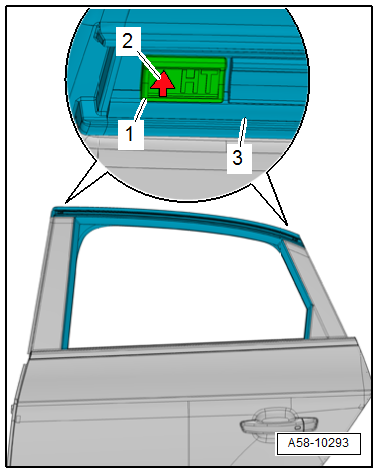
- Align the trim molding -1- on the C-pillar door flange, and insert from below into the clips -3- and window guide -2-.
- Push on the entire length of the trim molding.
TIP
For an easier installation, spray the seal with soapy water, for example.
Trim Molding, Removing and Installing, Side Window
Removing
- Remove the side window. Refer to → Chapter "Rear Side Window, Removing and Installing".
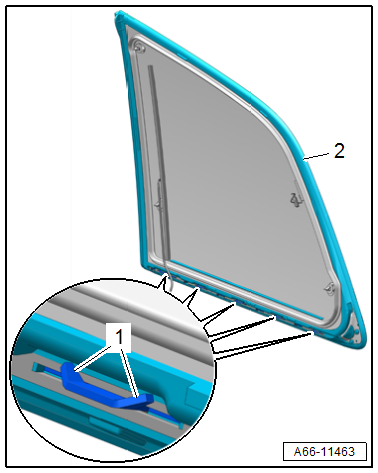
- Bend the tabs -1- straight.
- Carefully pry the trim molding -2- out of the window guide -arrows- and remove it.
Installing
Install in reverse order of removal.
Cover, Removing and Installing
Wheel Housing Liner Cover, Removing and Installing
Fender Cover, Removing and Installing:
Removing
- Remove the expanding rivets -arrows-.
- Remove the cover -1- from the fender -2-.
Installing
Install in reverse order of removal.
Side Sill Cover, Removing and Installing:
Removing
- Remove the expanding rivets -arrows-.
- Remove the cover -1- from the side sill -2-.
Installing
Install in reverse order of removal.
READ NEXT:
 Sill Panel Trim, Removing and Installing
Special tools and workshop equipment
required
Roller -3356-
Trim Removal Wedge -3409-
Wiring Harness Repair Set - Hot Air Blower -VAS1978/14A-
Cleaning Solution -D 009 401 04-
Applicator -D 009 500
Door B-Pillar Trim, Removing and Installing
B-Pillar Door Trim, Removing and Installing, Front
Removing
- Move the door window into the "open" position.
- Remove the window frame trim panel. Refer to
→ Body Interior; Rep.
Floor Heat Shield, Removing and Installing
Plenum Chamber Bulkhead Heat Shield, Removing and Installing
Removing
- Remove the plenum chamber bulkhead. Refer to
→ Chapter "Plenum Chamber Bulkhead, Removing and Installing".
- R
SEE MORE:
General Safety Precautions
As per VBG 20, German industrial liability insurance
association.
Pay attention to the workshop-specific instructions. It
should be kept in the workshop.
Product Characteristics
Refrigerants used in motor vehicle air conditioning systems
belong to the new generation of refrigerants based on
ATF
ATF Level, Checking
Special tools and workshop equipment required
Vehicle Diagnostic Tester
Used Oil Collection and Extraction Unit -SMN372500-
Pressurized Gearbox Oil Filler Kit -VAS6617- with
Pressurized Gearbox Oil Filler - Hand Pump -VAS6617/1- and
Pressurized Gearbox Oil Filler - Adapter
